One of the most important choices in The Final Stand 2 are maps. With each map composing of different elements, how you play is mostly determined by which map you’re on. Each map requires a different strategy in order to win.
In the Awards section of the menu, there are a wide variety of awards you can unlock by beating a map on wave 30. Rewards are greater the higher the difficulty you play the map on.
On nightmare and above, there is a “guaranteed uncommon” that always appears on wave 1. The uncommon that spawns depends on the map. On impossible, there are 2 uncommons on wave 1, so the second uncommon is randomized.
There are 4 types of special zombies that appear on every map: Berserkers, Hunters, Boss Zombies, and Drench Wraiths (Encroached Fog mutation only).
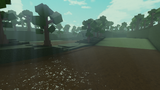
Forest

Forest thumbnail.
The forest is the first and most iconic map in the game. It features the least gimmicks out of the other maps and thus has been considered the one of the easiest map by the FS2 community.
Unlike other maps, there is a rare chance of a desert or snow variation appearing instead of the usual forest. It is only a visual difference and does not directly affect gameplay.
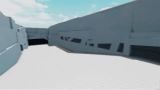
Road Tunnels
Two tunnels are located at the ends of the road, opposite of each other behind the barricade. The Mobile Shop will pass through these tunnels when conditions are met. Only wraiths will spawn from here.
Main Tunnel
Approximately 530 studs away from the shop is the main tunnel, where all zombies spawn from, excluding wraiths.
Strategies
There is very little that the map forces you to adapt to, with the only true gimmick being that wraiths will spawn from the back. As long as you can handle the wraiths, you should be fine.
(NM+ info) The guaranteed uncommon for Forest is the Boomer, try to keep a distance.
Unique Special Zombies
Wraiths only.Canyon
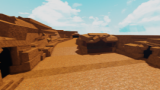
Canyon thumbnail.
The Canyon is a map added in the 3.1 update. Unlike a singular pathway, the canyon is composed of two split paths, one above ground and the other underground.
Previously this was named the Desert map, but was changed in the 3.1.1 update to prevent confusion to the desert variant of the forest map.
Small Tunnels
These tunnels are located behind the barricade and are simply a means for the Mobile Shop to arrive on the map. No zombies will spawn from these tunnels.
Overground Pathway
The path with the upward incline leads to the overground pathway. For waves 1-5, all zombies spawn here (except on impossible where destroyers spawn on the bottom from wave 1). There is also a ledge that, if the bottom path is open, let’s you jump down to the front of the bottom path.
Underground Tunnel
The path leading underground leads to the underground tunnel. The tunnel is dark on the inside, which decreases visibility unless you have night vision goggles. The only bright area is next to where the zombies spawn because of a hole in the roof. This pathway is blocked off until wave 6 because no zombies will spawn there until then (in Impossible mode the pathway will be opened from the start). At wave 6, the spawn rate of zombies underground will be low, but will gradually be more frequent up until wave 10 when the spawn rate is identical to the one overground. All types of zombies will spawn from the underground, including Destroyers.
Strategies
Soloing this map isn't recommended, since there'll be an alternative pathway for zombies to reach the shop, which'll have to be manned by at least one person, preferably the 2nd for dealing with destroyers.
Canyon strategies usually revolve around the threat of destroyers. If you can’t handle the destroyers, you won’t survive.
(NM+ info) The guaranteed uncommon on Canyon is the Flamer. Keep in mind it has fire resistance and the damage can quickly stack.
Unique Special Zombies
Destroyers only.Arctic
Arctic thumbnail.
The Arctic is a map added in the 3.2 update. There are multiple paths on this map, each stemming from the main path. The main path is comprised of two downward inclines which lead to the main tunnels. This map is also considered to be one of the easiest due to the ability to hide in the secondary tunnel.
Small Tunnels
These tunnels are located left to the front of the shop behind the barricade and simply serve as a means for the Mobile Shop to arrive on the map. No zombies will spawn from these tunnels. The open area that houses these tunnels can be freely walked on by the players.
Frost Wraith Tunnel
This tunnel is at the end of the cave located at the right of the front of the shop. Frost Wraiths spawn from this tunnel.
Secondary Tunnel
This tunnel is located in the cave to the left after the first downward incline. This tunnel spawns the same zombies that the main tunnel spawns starting from wave 6. The spawn rate starts low, increasing until wave 10 where its spawn rate stops increasing. It spawns less overall. There is also water in this tunnel that has no effects on gameplay.
Main Tunnel
After both downward inclines is the main tunnel, facing the front of the shop. Most zombies will spawn from this tunnel.
Strategies
Like Forest, Arctic is quite empty on gimmicks that make the map more difficult, so most strategies will work. Wraith watching is easier on Arctic. Beware, however, of the terrain, as it becomes a noticeably slight inconvenience, especially when camping the ammo box.
(NM+ info) The guaranteed uncommon on Arctic is the Crawler. If you are gear spawn killing, then this map usually works better than Forest because you do not need Shockproof.
Unique Special Zombies
Frost Wraiths only.Cityscape
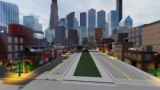
Cityscape thumbnail.
The Cityscape is a map added in the 4.0 update. Despite appearing as a simple linear map like the Forest map, there are multiple locations the zombies can spawn from and features a greater difficulty than Forest.
The Cityscape is actually a community map made by MuffinsAndTwinkies. The map won first place in The Final Stand 2 Mapping Contest held on August 1st, 2019 on the official FS2 Discord and thus was added to the game. There are multiple easter eggs present in the map, one of the most noticeable ones is that some of the buildings and posters references a noticeable FS2 player. To name a few this includes the Muffin Shop (MuffinsAndTwinkies), Ja's Swords and Knife Shop (Mister_Ja), Scarlightning (CARLightning), and Nathaniel's Famous Meme Weapons (Nathaniel57). There is a little easter egg where if you look to the right of the broken overpass through the end of the map, you may find a billboard with an avatar and some words. The avatar is Supreme_Archangel and the words are "Invest In Supreme Memes."
Road Tunnels
Behind the barricade are two tunnels located at each end of the road they're connected in. The Mobile Shop will arrive from these tunnels. Zombies (including Berserkers and the Boss) will rarely spawn from these tunnels starting at wave 21.
Subway Staircases
Just in front of the barricade are two staircases located opposite of each other. Lurkers will spawn only from these staircases. Most other zombies (including Berserkers and the Boss) will rarely spawn from these staircases starting at wave 21.
Alleyways & Buildings
These may seem purely cosmetic to the map at first, but zombies can spawn from these alleyways and buildings (including Berserkers and the Boss) starting at wave 11.
Broken Overpass
At the middle of the map is the broken overpass, the two ends of the overpass are facing against each other. Wraiths will spawn only from these overpasses, with other zombies joining the spawn points starting at wave 21.
Highway Overpass
Just after the broken overpass with the highway overpass. Zombies will start to rarely spawn from the overpass at wave 2, gradually increasing in spawn rate up until wave 10.
Main Tunnel
Located at the end of the map to the left is the main tunnel. Zombies will always spawn from this tunnel. There is a noticeable impassable area infront of the zombie spawn (which is the map boundary).
Strategies
Focus on having the firepower to stop lurkers. Frontlining is a terrible idea past wave 10 because you will get flanked on every side if you go up, and on Nightmare, wraiths and lurkers coming early will also force you to improvise.
(NM+ info) The guaranteed uncommon on Cityscape is the Armored/Helmet Zombie. Recommended to have melee for this map on nightmare.
Unique Special Zombies
Lurkers and Wraiths. Best not to choose this map due to the variety in special zombies, especially on public servers where having more players in a server make a Lurker's HP high.Swampland
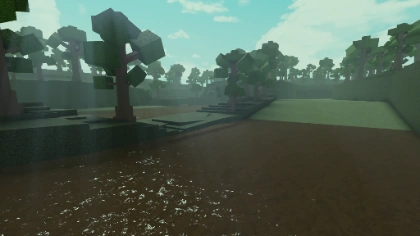
Swampland thumbnail.
The Swampland is a map added in the 5.1 update. It is the most complex (and by the community, the hardest) map in the game. In addition to its many diverging paths, a Swamp Giant spawns at the beginning of every wave starting at wave 11 (6 or 1 if in nightmare or impossible mode respectively). There is also mud in the 3 grass pathways that will slow the Swamp Giant and any player on the mud, but it will not slow down other zombies. This is considered the hardest map in the game due to the 3 pathways and the swamp giant, requiring acutal teamwork.
Left Cave
Wraiths spawn from here at wave 21. (11 on Nightmare, 1 on Impossible)
Left Pathway
Zombies spawn here at waves 1, 4, 5, 6, 8 and onward.
Middle Pathway
Zombies spawn here at waves 2, 5, 6, 7, 9 and onward.
Right Pathway
Zombies spawn here at waves 3, 4, 5, 7 and onward.
Right Cave
Wraith spawn from here at wave 21. (11 on Nightmare, 1 on Impossible)
Secret Shop
Instead of a Mobile Shop, the Swampland has a Secret Shop located in the Right Cave in front of the zombie cave spawn. Unlike the Mobile Shop, the Secret Shop is open only at night during a boss wave (or a chance at every other night with the Monetary Incentive upgrade), putting buyers at the mercy at any Wraith that spawns in the cave. Unlike the Mobile Shop, the Secret Shop only houses 4 random futuristic weapons every opening, 1 green Laser Weapon (Laser Pistol or SMG), 1 blue Laser Weapon (Laser Rifle or Shotgun), 1 Energy Weapon (Energy Rifle or Sword), and exclusive to the Secret Shop, 1 Plasma Weapon (Plasma Grenade Launcher or Rocket Launcher). The Laser Minigun is unobtainable in the secret shop.
Strategies
The combination of excessive amount of zombie spawns, a swamp giant, and a rather small open area near the shop makes this map a huge pain. You can simply brute force through the zombies on lower difficulties, but on higher difficulties this map begins to show what it can really do. Swampland on nightmare is a great achievement, impossible difficulty being one of the hardest challenges in the game.
For Swampland, you need:
- Someone to bait the swamp giant
- Some way to protect the bait, you can use deployables or a second player for this.
- A tank, preferably. It’s not required in hard and below.
- Good players. On public servers, any new players will make it way harder to win. On nightmare, you can’t afford a single new player because of how difficult it gets.
(NM+ info) The guaranteed uncommon on Swampland is the Toxic Zombie. The toxic buff on zombies can be lethal, especially on the swamp giant.
Unique Special Zombies
Swamp Giant and Wraiths. Make sure you know how to handle the Swamp Giant before playing this map.Lakeside
The Lakeside is a map added in the 5.4 update. It is the map that won the first place in the Final Stand 2 Mapping Contest 2021, designed by Feinapfel. Like Cityscape, this map is deceptively simple-looking while actually containing many problems that have to be worked around. The map has a huge lake spanning the right half of the map (which is why the map is called Lakeside) and there are 5 areas for zombies to spawn in total in 3 distinct regions.
Main Tunnels
There are two main tunnels on the opposite end of the map: Road tunnel and the sewer tunnel (in which the latter is located down the slope). During waves 1-9, zombies will spawn from one of these paths, with the exception being wave 5 (because it is a boss night, it spawns from both tunnels). The pattern for which side the zombies spawn from is: Road tunnel on an odd-numbered night and the sewer tunnel on an even-numbered night.
House on the Hill
There is a house located on the hill near the shop. The house has a big hole in which zombies can come out of. Next to the house is a tunnel, which is another zombie spawn point. Zombies (including Berserkers, Spongers, and the Boss) start going there at Wave 11.
Lake
The Lake is where the Drench Wraiths come at. Zombies (including Berserkers, Spongers, and the Boss) can come from the lake on Wave 21.
Secret Shop
The secret shop in the Lakeside map is located right next to the shop. Functions the same as the one in Swampland. If you want to get plasma weapons in career mode, then choose this map over Swampland due to the location of the secret shop making it convenient.
Strategies
Stay back, mostly. The lake makes frontlining a pain later on, and the back path can get you killed because it could spawn a sponger. This map is oddly parallel to Cityscape in many ways, so whatever strategies that are good on Cityscape can work well on Lakeside too.
(NM+ info) The guaranteed uncommon on Lakeside is the Boomer. This, combined with early Drench Wraiths and Spongers, makes Lakeside an even bigger pain to complete.
Unique Special Zombies
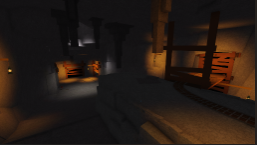
Spongers and Drench Wraiths, though the latter will appear on other maps when playing Encroached Fog mutation.Underground

Underground thumbnail.
The Underground is a map added in the 6.0 Update. The map takes place in a mine, which is why it's called Underground. In front of the spawn is a gigantically tall hole in the ceiling, allowing light to pierce through the otherwise dimly lit map. The map has three pathways.
Side Pathways
The side pathways converge into one, with the end of the pathways having the Main Tunnels where the zombies spawn from.
Center Pathway
The center pathway is separate from the side pathways, overlooking them. You are able to drop down from the center path to the side pathways.
Main Tunnels
There are three primary entrances. These entrances are where most of the zombies will spawn. The front entrance is on the ground, while the left and right entrances are elevated. When the game starts, these entrances will be barricaded off, but as Wave 1 progresses, the barricades will be destroyed in a random order. Destroyers will start spawning on Wave 11, they will go straight for the shop, so be careful.
Secondary Tunnels
There are multiple side tunnels where Miner Zombies will spawn from and potentially flank you if you are frontlining. The first tunnel will not open until Wave 6/3/1 (Hard/NM/Impossible), but as the game progresses, more tunnels will open up, allowing for more Miner Zombies to enter. The Miner Zombies have a lot of health, making them painful to deal with sometimes.
Secret Shop
Instead of a Mobile Shop, the Underground has a Secret Shop located in the middle of the Left Pathway. Unlike the Mobile Shop, the Secret Shop is open only at night during a boss wave.
Strategies
Stay back. Do not frontline, because Miners can flank you easily. Keep your distance when fighting Miners on higher difficulties, because they can toss explosives that deal a lot of damage.
(NM+ info) The guaranteed uncommon on Underground is Random.
Unique Special Zombies
Miners, Destroyers, and Wraiths.Subway
Subway thumbnail.
Main Tunnel
This is where most of the zombies spawn from. Located on the opposite side of the Shop. The middle lane leads into a tunnel that split into two. Zombies take turns to spawn on each tunnel, starting from the right one. Zombies will exceptionally spawn from both side at boss waves and starting at wave 10.
Side Tunnel
There are two tunnels on both side lanes. Annihilator and other zombies spawn from here, including bosses, hunters and berserkers. The right side, which has the farthest tunnel, opens at wave 5 (Easy - Hard) and wave 4 (Nightmare). The left side, where the tunnel is closer to the shop, opens at wave 10 (Easy - Hard) and wave 5 (Nightmare). Both tunnels open immediately right when wave 1 starts on Impossible difficulty.
Upper Tunnel
On the stair on the right side, there is an another tunnel where Wraiths spawn from, starting at wave 11 (Easy - Hard) and wave 6 (Nightmare). Secret Shop also arrive in the form of train.
Secret Shop
Instead of the Mobile Shop, this map has a secret shop that sells plasma weapons in addition to laser weapons. However, unlike Secret Shops in other maps, this one open after each boss waves, not during.
Strategies
There are a total of 5 zombie spawn points in this map (2 on main tunnel, 2 on the side, and one Wraith spawn), so make sure to have teammates who are prepared to take care of each tunnels. Since there are a lot of special zombies in this map, place some Motion Sensor for better tracking of special zombies.
(NM+ info) The guaranteed uncommon on Subway is Electrics.
Unique Special Zombies
Annihilators and Wraiths. Be sure to drain Annihilators health since they go for shop first unless their HP drops below 80%, where they will then target the nearest player.Awards
If you/your team successfully defend the shop for 30 in-game days, you will receive an award. Awards consist of extra perk point(s) and unlocking of exclusive upgrades for certain weapons that cannot be purchased unless you beat the game on certain map/difficulty.
Harder map/difficulty will grant you more perk points and unlock more powerful upgrades, though such maps are very difficult to play and requires strategical use of weapons, equipment, perks, mods, and teamwork.
| Map | Difficulty | Perk Point(s) | Weapon Upgrade |
|---|---|---|---|
| Forest | Normal | 1 | Flintlock Rifle (Aluminium Body) |
| Forest | Hard | 1 | Sterling (Extended Mags) |
| Forest | Nightmare | 2 | M4 (Ammo Efficiency) |
| Forest | Impossible | 3 | M82 (Extended Mags) |
| Canyon | Normal | 1 | Revolver (Improved Grip) |
| Canyon | Hard | 1 | Katana (Lucky Slash) |
| Canyon | Nightmare | 2 | AK-47 (Akimbo) |
| Canyon | Impossible | 3 | Minigun (Fully Loaded) |
| Arctic | Normal | 1 | Luger (Akimbo) |
| Arctic | Hard | 1 | Stakeout (Slam Fire) |
| Arctic | Nightmare | 2 | Intervention (Marksmanship) |
| Arctic | Impossible | 3 | RPG-7 (Barrel Extension) |
| Cityscape | Normal | 1 | Baseball Bat (Head Bash) |
| Cityscape | Hard | 1 | DB Shotgun (Slug Rounds) |
| Cityscape | Nightmare | 2 | UMP45 (FMJ Rounds) |
| Cityscape | Impossible | 3 | RPK (Piercing Rounds) |
| Swampland | Normal | 1 | M1 Garand (Telescopic Sight) |
| Swampland | Hard | 1 | M16 (Custom Receiver) |
| Swampland | Nightmare | 2 | M24 (Scattershot) |
| Swampland | Impossible | 3 | M249 (Sharpnel Rounds) |
| Lakeside | Normal | 1 | Military Axe (Skull Blade) |
| Lakeside | Hard | 1 | M93R (Fully Loaded) |
| Lakeside | Nightmare | 2 | Trench Gun (Piercing Rounds) |
| Lakeside | Impossible | 3 | Chainsaw (Lucky Chains) |
| Underground | Normal | 1 | Desert Eagle (Reflex Sight) |
| Underground | Hard | 1 | AA-12 (Extended Drum) |
| Underground | Nightmare | 2 | SCAR-H (SSR Kit) |
| Underground | Impossible | 3 | M79 (Aluminium Tube) |
| Subway | Normal | 1 | Micro Uzi (Greased Trigger) |
| Subway | Hard | 1 | DMR (Lucky Shot) |
| Subway | Nightmare | 2 | M1014 (HE Rounds) |
| Subway | Impossible | 3 | AUG (Fully Loaded) |
Gallery
")
")
")
")
")
")
")
")