Final Stand 2 Wiki
Advertisement
Final Stand 2 Wiki

If you are new, make sure to check out Perk Builds to get some good beginner builds. - GabeTX

Maybe if you're the creative type, you could add in perk ideas in this page here, credited to GoldenBoy777. - Peepeeman6969 (very mature name, I know.)

Perks are obtainable bonuses in The Final Stand 2. They may provide a boost to specific player stats, or provide some other kind of advantage.

Basics

When a player gains a level, they obtain 1 perk point, with 1 additional perk point awarded every 5 levels. Additional perk points can be obtained by using ROBUX or completing Awards. Perk points can be spent in the perks menu to unlock or upgrade perks. They are equipped in perk slots, which are seen in the in-game Menu and Unlocks page. Perks are only active when equipped in a perk slot. Perks are bound to the player and are not lost by leaving/running out of shop lives.

PerkLevels

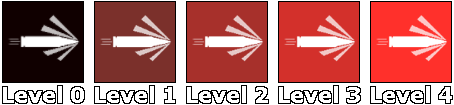
Perks cost 1 perk point to unlock at Level 1. Upgrading a perk to Level 2 costs 2 perk points and upgrading to Level 3 costs 3 perk points. Higher level perks provide stronger bonuses. It is highly recommended to fully upgrade perks to maximize their value in perk slots. It takes 6 perk points total to get a perk to level 3. Level 4 perks can be obtained via getting to level 50 and then going to the Unlocks > Prestige tab to permanently keep a perk unlocked at Level 4.

Certain perks are locking perks, meaning that once you leave spawn with them equipped, or if you equip them after leaving spawn, they can not be unequipped until the current game ends/you join another game. The perk in question will gain a red border in the perks menu to indicate that it is locked. They will also be indicated as a locking perk in red text when selected. Locked perks cannot be removed midgame via Prestiging or using a Respec Token.

Certain perks may affect the game itself and stack with other players who equip the same perk, and thus may be saddled with a stacking penalty. This stacking penalty may be indicated with green text upon selecting a perk that may stack with other players. The highest level perk will always have maximum effectiveness, and all subsequent perks will have reduced efficacy indicated by the stacking percentage.

The majority of perks that give an increase in stats are additive to themselves. (ex. Damage and Attack Speed) Certain perks however can provide bonuses that are multiplicative.

Perk Slots

Current perk slots

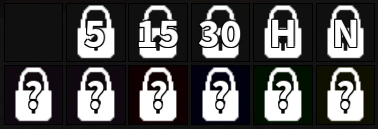
Players can equip up to twelve perks, given that they have all of the perk slots unlocked, though some perk slots only allow one perk color. They are unlocked by doing the following:

Perk Slot Objective Color Is it Permanent?
1 Unlocked by default. Any Yes
2-4 Becoming level 5, 15, and 30, respectively. Note that if you prestige a perk, you will be reverted to level 0 and lose these perk slots, and when that happens you must level up again to reclaim them. Any No
5-6 Beating wave 30 on any map on Hard and Nightmare, respectively. Any Yes
7-8 Beating wave 30 on all maps on Nightmare and Impossible, respectively. Any Yes* (If new maps are released, you'll lose access and need to win the new map)
9 Being on the top 10 weekly kills leaderboard of the previous week (lasts for 1 week). After the 5.7.2 update, if you join the game and the zombie slayer leaderboard shows you as #1 of the previous week, you will gain the 9th perk slot permanently.

Note that if you do not join the game while it says you are #1 of last week, then you won't get permanent 9th slot.

Red Yes (Top of the leaderboard)

No (1 week)

10 Completing all Challenges in the Awards section. Blue Yes* (New Challenges may be added in a future update)
11 The game checks if you've completed the current day's Mutation before.

If you have, then you will have access to this perk slot.

Thus, beating all Mutations means you have permanent access.

Green Yes* (New Mutations may be added in a future update)
12 Resetting in Career Mode for the first time.

(If you have reset Career before Patch 6.0, you should still receive this perk slot)

Yellow Yes

Respec Tokens

PerkRespec

Respec Tokens are items in the game that allows you to reset all of your non-prestiged perks back to level 0 and returns all spent Perk Points. Respec tokens cannot unequip equipped locking perks.

Respec Tokens can be obtained in three ways. The first way is buying them with ROBUX from the Product section of the store. You can get 1 Respec Token for 75 ROBUX, or in larger quantities for a cheaper cost per token. The second way you can get them is from the completion of various Awards/Challenges, such as reaching level 30 and level 50, and surviving night 30 on certain difficulties. The third way is to do a Career Reset for $10,000,000 in Career Mode. Every reset rewards a Respec Token along with 1 mod per $1,000,000 when resetting. Past $10,000,000, the amount of money required per mod increases exponentially.

Prestige

Players are given an option to permanently "prestige" a perk to level 4 once the player is level 50. Once the player has prestiged, their level is reset back to 0, all of their non-prestiged perks are refunded back to level 0, perk points obtained via leveling up are lost as well as the perk slots tied to their level. Perk points obtained from purchasing via ROBUX and as a reward from completing Awards/Maps/Challenges are kept. Prestiged perks are permanently at level 4 and cannot be changed. Other players can see that players have prestiged by looking at their level. For example, a level of "2-14" indicates that the player has prestiged twice and is currently level 14. Career Mode progress is saved if you prestige. Prestiging also gives a permanent 5% XP boost per prestige, and the bonus is reduced by 50% for every 20 prestige levels (E.g. 100% bonus XP at level 20, 150% at level 40, 175% at level 60 etc.).

  • Due to the nature of the XP boost decreasing by 50% every 20 levels, it is physically impossible to have an XP multiplier beyond 200% from prestiging. This is because the XP boost follows a convergent series, in which the boost constantly cuts in half, therefore making it so it'll infinitely shrink before ever making it past the 200% mark.

Perks

Perks in-game are divided into 5 categories based on the arbitrary category they fit into. Below is a list of all perks in The Final Stand 2.

Red perk names indicate a locking perk.

Red Perks (Offensive)

Red perks increase the player's damage output and combat effectiveness.

Perk Description Level 1 Level 2 Level 3 Level 4
Stopping power
Stopping Power
Increases the damage of your shots. +4% Damage +8% Damage +12% Damage +16% Damage
Notes
  • Only increases gun damage. Flamethrowers benefit from this bonus, but Launchers, Melee Weapons, and Flare Guns do not.
  • Velocity-based non-launcher weapons such as Crossbows, Compound Bows, Ice Rifles, and Tasers still benefit from this perk.
Tips
  • Due to the simple nature of the perk, it is applicable for a wide variety of gun builds.
Bullet storm
Bullet Storm
Increases your rate of fire with firearms. +8% Attack Speed +16% Attack Speed +24% Attack Speed +32% Attack Speed
Notes
  • Only increases firearm attack speed. Launchers and flamethrowers benefit, but melee weapons do not.
Tips
  • Due to the simple nature of the perk, it can fit within a wide variety of gun builds.
  • Good for builds/strategies that benefit from higher attack speed.
  • Guns that have manageable recoil despite increased attack speed benefit best.
SpeedLoad
Speedload
Increases your reload speed. +10% Reload Speed +20% Reload Speed +30% Reload Speed +40% Reload Speed
Notes
  • Reload time % after bonuses follows the formula 100/(100+X) with X being the +% Reload Speed.
  • Does not affect heat-based weaponry.
  • Since the Compound Bow does not reload, the Charge Time is instead accelerated.
Tips
  • Due to the simple nature of the perk, it can fit within a wide variety of gun builds.
  • By itself, it effectively reduces reload time by 9.09%/16.6%/23.08%/28.57%.
  • Weapons with long reload times/that have to reload frequently (e.g. Minigun, M60, and the M79) will benefit greatly.
Bandolier
Bandolier
Increases the amount of ammo you can hold. +15% Max Ammo +30% Max Ammo +45% Max Ammo +60% Max Ammo
Notes
  • Does not affect the ammo of equipment.
  • Does not work on weapons that do not have reserve ammo, such as Compound Bow, Chainsaw, M2 Flamethrower, and Mobile/Secret Shop weapons.
Tips
Steady Aim
Steady Aim
Decreases your weapon spread and recoil. +15% Accuracy and Control +30% Accuracy and Control +45% Accuracy and Control +60% Accuracy and Control
Notes
  • Accuracy gain and recoil reduction % after bonuses follows the formula 100/(100+X) with X being the +% Accuracy and Control.
  • Affects both Max and Min Accuracy.
Tips
  • Reduces spread and recoil by 13%/23.1%/31%/37.5%.
  • Recommended for weapons with low accuracy and high recoil, like the Minigun.
  • Works with hip fire unlike Steady Grip.
Blood Thirst
Bloodthirst
Increases your damage with melee weapons. +5% Melee Damage +10% Melee Damage +15% Melee Damage +20% Melee Damage
Notes Tips
  • Unless if you are a melee user, you will not benefit from this perk.
  • Outperformed by Ravage.
Fireworks
Fireworks
Increases the radius of explosives. +5% Explosive Radius +10% Explosive Radius +15% Explosive Radius +20% Explosive Radius
Notes
  • Affects almost anything with Radius in its stats, including equipment.
Tips
  • Launchers, Gas Cans, and Molotovs benefit heavily on this perk.
  • Does not work with frost generator and sentries.
Deep Mags
Deep Mags
Increases your magazine size. +12.5% Magazine Size +25% Magazine Size +37.5% Magazine Size +50% Magazine Size
Notes
  • Rounds up to the nearest whole number.
  • Works with Chainsaw, Compound Bow, and M2 flamethrower.
Tips
  • This is a perk that is viable on 90% of all builds.
  • Good for money printing.
  • A level 4 Deep Mags provides an extra shot for 1 clip firearms and launchers (only a few weapons like the Crossbow will reload the entire magazine, while others like the M79 must reload one shot at a time).
  • This perk can be superior to Speedload in some situations.
Deep Impact
Deep Impact
Your shots will pierce through enemies. +7% Pierce +14% Pierce +21% Pierce +28% Pierce
Notes
  • Pierces one target, next target only receives the % of the full damage and hit money.
  • Multiplicative with the weapon's base pierce.
Tips
  • Recommended to use with money printing builds, like the AUG.
  • Good for money printing.
Shadow rounds
Shadow Rounds
Your shots have a chance to not consume ammo. +8% Shadow Chance +12% Shadow Chance +16% Shadow Chance +20% Shadow Chance
Notes
  • Shadow rounds does not deplete a shot from the magazine.
  • Shadow rounds can also be shadowed, making you have 10%/15%/20%/25% extra ammo (assuming average chances).
Tips
  • Good for launchers (M79, RG-6, etc.)
  • Good for money printing.
  • Very useful with single-shot weapons as the free shot effectively skips a reload.
Critical plus
Critical Plus
Increases your critical hit damage multiplier. +25% Critical Damage +50% Critical Damage +75% Critical Damage +100% Critical Damage
Notes
  • Critical hits deal thrice as much damage normally.
  • Additive with the critical multiplier, so a level 4 Critical plus will increase the 3x damage of crits to 4x.
Tips
  • Only consider using this with weapons with a favorable crit chance (at least 33%).
  • Don't use it if you are already overkilling the zombies with the crits.
Concealed carry
Concealed Carry
Gain critical hit chance for weapons, every point over 3 weight reduces the chance by, 33.3%. +4% Max Critical Chance +8% Max Critical Chance +12% Max Critical Chance +16% Max Critical Chance
Notes
  • Only calculated for every individual weapon and not your total weight.
  • Does not affect Knife.
Tips
  • Useful with weapons that weigh 4 or below.
  • You can use Weapon Hoarder to make this work with slightly heavier weapons,like M82 or Laser Minigun (only when prestiged though), but it is only worth it if it makes the weight 3 or lower.
Ravage
Ravage
Increases critical hit chance and attack speed with melee weapons. +2.5% Critical Chance
+4% Attack Speed
+5% Critical Chance
+8% Attack Speed
+7.5% Critical Chance
+12% Attack Speed
+10% Critical Chance
+16% Attack Speed
Notes Tips
  • Just like Bloodthirst you should only use this if you are a melee user.
Head hunter
Head Hunter
Every headshot will increase your bullet damage up to 4 stacks. Missing the head will drain stacks. +2% Damage
+8% Max Damage
+4% Damage
+16% Max Damage
+6% Damage
+24% Max Damage
+8% Damage
+32% Max Damage
Notes
  • Headshots give 1 stack. Landed shots other than the head reduces 1 stack while missed shots drain all stacks.
  • Works with Center Mass and Limb Breaker.
Tips
  • Very inconsistent, better to use Marksman.
  • Using a gun without armour pierce makes this perk get countered by armour zombies.
Heavy Bullets
Heavy Bullets
Increases the damage and accuracy of your shots but reduces your total attack, reload and cooling speeds by 15%. Total recoil is also increased by 50%. +20% Damage
+20% Accuracy
+25% Damage
+25% Accuracy
+30% Damage
+30% Accuracy
+35% Damage
+35% Accuracy
Notes
  • Penalties are multiplicative with other perks. (Cooling/Reload penalty needs verification)
  • Damage bonus is additive with other perks.
  • Accuracy bonus follows the same formula as Steady Aim.
  • A safer option than Glass Cannon
Tips
  • Do not use this on M82 or AWM as the recoil increase instead makes your DPS worse, as the recoil cannot recover before the fire cooldown does.
  • Energy Rifle and any weapon that has only 1 round in the magazine (i.e. Crossbow, Flintlock Pistol, and Flare Gun) are potentially good candidates because the recoil doesn't stack due to having to reload every shot.
Long Range
Long Range
Increases the range, zoom and velocity of firearms. This bonus is halved for fuel based weapons. +20% Range
+20% Velocity
+25% Zoom
+40% Range
+40% Velocity
+50% Zoom
+60% Range
+60% Velocity
+75% Zoom
+80% Range
+80% Velocity
+100% Zoom
Notes
  • Zoom even affects weapons without a scope, increasing zoom while aiming down sights.
  • Zoom bonus can be adjusted in the settings.
  • The range bonus affects flamethrowers, but only half as much. (60% becomes 30% increase to range)
Tips
  • Might be valuable to snipers during the early mid-game if no other perks are necessary.
  • If you are unable to reach zombies then this may give you the range to do so.
  • Used on Laser Shotgun to maximize it's pierce potential.
Direct hit
Direct Hit
Deal extra damage on impact with launchers and gain increased velocity. Direct hits ignore armour and have increased radius. +50% Impact Damage

+5% Impact Radius
+20% Velocity

+100% Impact Damage

+10% Impact Radius
+40% Velocity

+150% Impact Damage

+15% Impact Radius
+60% Velocity

+200% Impact Damage

+20% Impact Radius
+80% Velocity

Notes
  • Impact damage only applies to the zombie hit with the projectile.
  • Damage bonus only applies to Launchers.
  • The Velocity bonus does apply to any velocity-based weapon. (This includes Crossbow, Compound Bow, and Ice Rifle).
  • Armor ignorance also ignores the explosive damage resistance of Lurkers and Bosses.
  • Additive with other damage perks.
Tips
  • Launchers with a high innate damage benefit better. Plasma Rocket Launcher with Specialized Plasma upgrade benefits the most, as it can deal colossal damage to special zombies, particularly the dangerous ones like Berserker and Boss Zombie.
  • It is commonly used on Grenadier builds to deal with Bosses, Armoured zombies, Lurkers, and Hunters.
Long shot
Long Shot
Your shots will gain more damage the further they travel. +1% damage per 25 studs +2% damage per 25 studs +3% damage per 25 studs +4% damage per 25 studs
Notes
  • The damage scaling is a step function, which means if you shoot a zombie from 215 studs away, you'll only get 8/16/24/32% boost in damage, not 8.5/17/25.5/34% boost.
Tips
  • The distance between the main zombie spawn and the shop is ~500 studs. Varies per map.
  • Matches Stopping Power at 100 studs.
  • Typically, long-range players need to deal with both close and distant targets dependent on various factors, so usage of this perk is situational.
Reseve cooling
Reserve Cooling
Heat weapons will keep cooling and energy weapons will keep charging while unequipped. Additionally weapons cool 30% faster. 40% Heat Decay

40% Energy Speed

60% Heat Decay

60% Energy Speed

80% Heat Decay

80% Energy Speed

100% Heat Decay

100% Energy Speed

Notes
  • Weapons handling and most reload perks do not affect laser weapons.
Tips
Specialised Killing
Specialised Killing
Increases the damage of your shots against special enemies. +15% Damage +30% Damage +45% Damage +60% Damage
Notes
  • Wraiths, Frost Wraiths, Drench Wraiths, Destroyers, Lurkers, Berserkers, Swamp Giant, Miners, Annihilators, Spongers, Hunters, and the Boss are considered special enemies.
Tips
  • Specifically target these zombies when they appear.
  • Mostly used on maps with mutliple special zombies, for example Underground or Lakeside.
Bullet hell
Bullet Hell
Each point of walkspeed over 12 will increases your rate of fire with firearms. +2.5% Attack Speed +5% Attack Speed +7.5% Attack Speed +10% Attack Speed
Notes
  • The calculation is based on your current movement speed.
    • This means you have to be moving to be given the attack speed bonus.
  • Only increases attack speed of held weapons that fire some type of projectile, whether hitscan or velocity-based. Thus, melee weapons are not affected.
Tips
  • You will not benefit from this perk if you are standing still.
  • Outperforms Bullet Storm at 16 walkspeed or above.
    • This means without perks it will only be as good as Bullet Storm with nothing but a Pistol.
  • Lightweight and Pack Mule can be used to maintain a high walkspeed. Critical Speed is a similar functioning perk that also increases DPS.
  • Can still be used decently with bullet storm even at 15 walkspeed.
  • Run N' Gun can also be used to drastically boost this combined with Adrenaline, although it may be a bit perk slot inefficient if the perks are not prestige and you are also not using Critical Speed.
  • Scavenger is also a really good perk to pair with this, as it both has a 40% speed boost while picked up and the ability to heal and regain ammo, combined with Skull Combustion makes it very good for spawncamping.
Heavy impact
Heavy Impact
Each point of weight will increase your damage with melee weapons. +0.6% Melee Damage +1.2% Melee Damage +1.8% Melee Damage +2.4% Melee Damage
Notes
  • Calculated by total weight.
Tips
  • Better than Bloodthirst at >9 weight.
Berserker
Berserker
The lower your health, the more damage you will deal. +20% Max Damage +40% Max Damage +60% Max Damage +80% Max Damage
Notes
  • Affects all sources of damage, except equipment and DOT.
  • The % Damage increase from this perk is shown in the hotbar.
Tips
  • Max health, resistance, healing, or health lowering perks may be recommended.
  • Usually used with melee.
  • Equal to Bloodthirst at 65% hp, doubles Bloodthirst at 30%.
  • can be a good source of damage for explosive weapon with the use of Danger close to lower yourself and Shcokproof to reduced the damage taken to a controlable amount
Reach
Reach
Increases the range of melee attacks. +0.4 Melee Range +0.8 Melee Range +1.2 Melee Range +1.6 Melee Range
Notes
  • Range is measured in studs.
Tips
  • Low range melee weapons such as Military Axe or Knife benefit greater.
  • Rampage and other speed-increasing perks are preferred as simply outrunning zombies is preferred over than outranging them.
Skull combustion
Skull Combustion
Enemies killed by a headshot have a chance to explode. +6% Explosion Chance +12% Explosion Chance +18% Explosion Chance +24% Explosion Chance
Notes
  • Does 200% wither damage to nearby surrounding zombies (equivalent to twice the max health of a pale common zombie).
  • Works with center mass and limb breaker.
Tips
  • The wither damage is usually enough to kill almost all uncommon and common zombies in the explosion.
  • On impossible mode, some of the uncommons have more than 2x the hp of a pale common, so those uncommons will not die from this if they are near max hp.
  • Used for gun spawncamp builds.
Bullseye
Bullseye
Decreases your minimum weapon spread. Reduced by 30% for weapons that fire multiple projectiles. -60% Spread -70% Spread -80% Spread -90% Spread
Notes
  • Max accuracy gain % after bonuses is calculated by the formula 100/(100+X) with X being the +% Max Accuracy.
  • Only effects the Max Accuracy of the weapon and not Min Accuracy.
Tips
  • Reduces minimum spread by 28.6%/44.4%/54.5%/61.5%.
  • Single shot firearms and firearms with low recoil that are not favorably accurate are recommended w/ this perk.
  • This perk is mainly used with M203 and Sawed-off Shotgun
  • Steady Aim is a better alternative for most weapons.
Marksman
Marksman
Increases the damage of your shots against heads but decreases it by 20% elsewhere. +6% Headshot Damage +12% Headshot Damage +18% Headshot Damage +24% Headshot Damage
Notes
  • Works with Center Mass and Limb Breaker.
  • Helmet zombies will counter this if you do not have armour pierce (or a way to headshot on other parts of body).
Tips
  • More consistent than Head Hunter.
  • Recommended to use Stopping Power instead, as most weapons cannot use marksman well.
  • This perk is better than Stopping Power for that have Limb Breaker or Center Mass for example: M82.
Unlucky Shot
Unlucky Shot
Gain critical hit chance for every failed critical hit. Amount gained scales with your base critical hit chance. Chance resets on critical shots. 0.3s Cooldown. +15% Max Critical Chance +30% Max Critical Chance +45% Max Critical Chance +60% Max Critical Chance
Notes
  • The cooldown refers to the amount of time required to pass before the unlucky shot crit chance can increase from a critical miss.
  • The critical gain acquired per miss is like this: I have 50% crit chance. If I miss a shot, I get 75% crit chance.
Tips
  • Don't use this with weapons that rely on having fast firerate, unless it's slower than the cooldown.
  • Sometimes used with M82 or Energy Rifle during the endgame of impossible.
Implosion
Implosion
Increases your explosive damage but decreases your total explosive radius. +30% Explosive Damage

x0.8 Explosive Radius

x0.2 HE Radius

+40% Explosive Damage

x0.8 Explosive Radius

x0.2 HE Radius

+50% Explosive Damage

x0.8 Explosive Radius

x0.2 HE Radius

+60% Explosive Damage

x0.8 Explosive Radius

x0.2 HE Radius

Notes
  • Total explosive radius means the radius penalty is also multiplicative with radius perks & mods.
  • Also affects equipment.
Tips
  • Fireworks will have a diminished effect if it is equipped alongside this perk.
  • The damage upside is additive with other generic damage perks.
Headshot Stash
Headshot Stash
Killing an enemy with a headshot has a chance to replenish up to 3 ammo, depending on magazine size. +30% Ammo Chance +40% Ammo Chance +50% Ammo Chance +60% Ammo Chance
Notes
  • Ammo goes into the reserve.
  • Restores 1 additional ammo per 20 in the weapon's magazine capacity.
  • If the killing blow was made with premium ammo, then it refills premium ammo instead of regular ammo.
Tips
  • One shot kill weapons that get a lot of headshot kills benefit the best, especially if they have piercing capabilities.
Avenger
Avenger
Gain 100% critical hit chance whenever a teammate dies. +10s Critical Duration +20s Critical Duration +30s Critical Duration +40s Critical Duration
Notes
  • Duration refreshes if a teammate dies before Avenger lapses.
Tips
  • Might be useful if your teammates die often in the early game, or if you're using the Blood God strat. (meleeing with avenger)
  • If your team is cooperative to stay alive then this loses its use.
  • Not as useful in late and endgame when the waves are much longer.
  • Usually used with the Knife/Bat on wave 1, then a Bat/Katana on wave 2, then Katana on wave 3 and 4. Midas Touch is also sometimes seen with this for a large early game boost.
  • Once you are past wave 9, consider getting rid of this perk.
Steady Grip
Steady Grip
Reduces recoil gain and increases recoil recovery and accuracy while aiming down sights. -20% Aim Recoil
+10% Aim Recovery
+10% Aim Accuracy
-30% Aim Recoil
+20% Aim Recovery
+20% Aim Accuracy
-40% Aim Recoil
+30% Aim Recovery
+30% Aim Accuracy
-50% Aim Recoil
+40% Aim Recovery
+40% Aim Accuracy
Notes
  • Unlike Steady Aim, recoil reduction is multiplicative to the current recoil.
  • Accuracy gain % after bonuses is calculated by the formula 100/(100+X) with X being the +% Accuracy.
  • You must aim down the sights for this perk to take effect.
Tips
  • This reduces recoil more than Steady Aim, but keep in mind that this is only usable while Aiming Down Sights.
  • Useful for weapons with high initial recoil and automatic firearms that can ADS.
  • Does not increase accuracy as much as steady aim.
  • Does not work with hip fire.
  • This perk is mainly used on the M82 and Laser Shotgun.
Glass Cannon
Glass Cannon
Increases the damage you take by 100%, but also increases the damage you deal. +7% Damage +14% Damage +21% Damage +28% Damage
Notes
  • All forms of incoming damage including direct and DoT damage are doubled.
  • Increases your damage with everything except equipment and DoT.
  • If used with Pacifist, then Glass Cannon will be active until you reach 30% hp, then Pacifist will be active until you get back to 90% hp, returning you to Glass Cannon.
Tips
  • This is a perk that is viable on 90% of all builds.
  • The damage dealt to you may seem like a big downside, but with this perk you can kill them before they get to you entirely (not really). Furthermore, on higher difficulties, you die in a split second if the zombies reach you anyways. In addition, if you're on the roof, the weakness doesn't even matter usually.
  • Don't use this with melee.
Midnight Hunter
Midnight Hunter
Gain damage the closer you are to midnight. +10% Max Damage +20% Max Damage +30% Max Damage +40% Max Damage
Notes
  • Midnight is 00:00 in-game.
  • The % Damage increase from this perk is shown in the hotbar.
Tips
  • May be helpful during boss waves.
  • The average damage increase over the night is slightly stronger than Stopping Power.
  • You can use gear, barricade, and armour to compensate for when the night is far from midnight.
Gunslinger
Gunslinger
Gain increased pistol damage for each zombie killed with pistols up to 200%. Max kills per night increases overtime. +0.06% Damage Per Kill +0.09% Damage Per Kill +0.12% Damage Per Kill +0.15% Damage Per Kill
Notes
  • Limited to benefitting from 20 zombie kills per night. This cap increases by 2 for each additional night.
  • Missed kills from all previous nights can be caught up on any later night.
Tips
  • At level 4, you can reach the 200% damage bonus during wave 30.
  • At level 3, you can reach 176.4% damage during wave 30.
Rifleman
Rifleman
Increases your critical hit chance with single shot rifles. +4% Critical Chance +8% Critical Chance +12% Critical Chance +16% Critical Chance
Notes
  • Affects any weapon that is of Rifle and Sniper Rifle type (it even affects Ice Rifle).
  • Rifles do not lose the critical chance if they get an auto upgrade.
  • Does not work on assault rifles.
Tips
  • Sometimes used with the Energy Rifle and M82 with crit builds, especially for impossible mode.
  • Fast firing snipers like the DMR and PSG1 can use this consistently.
  • This works on every weapon in the Rifles category, including Anti-Materiel Rifles.
No Scope
No Scope
Increases your hip-fire damage with scoped weapons. +10% Damage +20% Damage +30% Damage +40% Damage
Notes
  • Hip fire is firing without aiming down sights.
  • Your weapon must have an attached scope for this perk to work.
  • Does not work with classic Rocket Launcher and XM25 despite having a scope.
Tips
  • Luger*, AUG, DMR, Tesla Rifle, Laser Rifle, and PSG1 are some scoped weapons with adequate hip fire accuracy. Energy Rifle is also a decent choice for this perk, as it no longer has a headshot multiplier, making highly accurate shots less necessary.
  • Using this makes it harder to get headshots, to the point that it may often result in lowering damage output instead of increasing it.
Danger Close
Danger Close
Increases your explosive damage, but enables 1.5% self damage. +12% Explosive Damage +18% Explosive Damage +24% Explosive Damage +30% Explosive Damage
Notes
  • Self damage scales with the launcher's damage.
  • Self damage is treated as direct damage and will scale with armour & resistances.
  • Also affects Skull Combustion and equipment.
  • Dying from self damage will display the death message, "[USERNAME] was killed by Danger Close".
Tips
  • Without bonuses, launchers with ≥5,000 damage will have the potential to instantly kill you.
  • Close range combat with launchers is not recommended.
  • Could be used to intentionally damage yourself to benefit from Berserker or to intentionally activate Undying or Time Freeze.
  • Glass Cannon gives similar damage for launchers, but without the downside of being able to accidentally die.
  • Useful for Mortar since the explosion can be made to consistently be in a place where you will not be.
Light Mags
Light Mags
Decreases your magazine size by 25%, but increases your reload speed for affected weapons. This bonus is reduced by 33% for weapons without detachable magazines. +35% Reload Speed +50% Reload Speed +65% Reload Speed +80% Reload Speed
Notes
  • Reload time % after bonuses follows the formula 100/(100+X) with X being the +% Reload Speed.
  • Weapons w/ detachable mags reload the entire clip all at once.
  • The weapon must have at least 3 mag size in order to work. Deep mags and mag size mods do not count for enabling this perk, but upgrades on a gun that increase the mag size to 3+ will work (akimbo sawed off, and mag size upgrades on classic rocket launcher)
Tips
  • The bonus for non detachable magazine weapons is 23.45%/33.5%/43.55%/53.6%
  • Unless you prestige this perk or use a non detachable magazine weapon like the energy rifle, then it is recommended to use Speedload instead.
  • Works well when prestige and used with Deep Mags.
Backup Weapon
Backup Weapon
Start the game with a better pistol. Your C96 gains +20 damage for every night survived. +C96
+Barrel Exension
+AP Rounds
+Extended Mags
+Telescopic Sight
+Custom Receiver
+Fast Hands
+Lucky Shot
+Bottomless Reserve
Notes
  • C96 upgrades can be found in the same display case as pistols and throwables.
  • More upgrades become buyable as the perk is upgraded.
  • Banned in Career Mode.
  • C96's base damage will increase by 20 every night. The stats screen is currently incorrect, but the damage bonus will apply.
  • Starts with a sell value of 0 until upgrades are bought.
  • A bit underwhelming considering it wastes a perk slot for the whole game.
Tips
  • This LOCKING perk will be rather disappointing if you try to use it as your main source of damage without the Gunslinger perk.
  • Viable to be used late-game while also giving you advantages early game, as long as you use certain perks beside it.
Defense Contractor
Defense Contractor
Increases the damage dealt by shop upgrades. Stacks with other players using Defense Contractor but at 75% efficiency. +10% Shop Damage +20% Shop Damage +30% Shop Damage +40% Shop Damage
Notes
  • Barricade's Barbed Wire and Shop Sniper are considered shop upgrades.
  • This perk actually also increases the damage from wither unlike some of the other perks. (Makes you wonder if this is on purpose or if the dev just had a bid of lazy coding)
Tips
  • Will give less damage output than perks like Stopping Power being used on a max Minigun or max M82, but can be decent around early to mid game if the shop sniper is maxed and a strong weapon is not available.
  • Although worse than simply using other perks, it is indeed useful on money alts, tanks and supports.
Strong Arm
Strong Arm
Throws grenades faster, further and they deal more damage. +20% Throw Speed
+12.5% Grenade Damage
+40% Throw Speed
+25% Grenade Damage
+60% Throw Speed
+37.5% Grenade Damage
+80% Throw Speed
+50% Grenade Damage
Notes
  • Only affects the Damage statistic on Grenade type equipment.
Tips
  • Useful if high damage is needed with a molotov and no gas cans are available, otherwise perks like Implosion and Fireworks will generally be better.
  • The extra throw speed can often make it harder to land a molotov exactly where you want it.
Charged Shot
Charged Shot
Gain increased damage the longer you aim down sights with scoped weapons. Charge resets each shot. Fully charged shots ignore armour. +150% Max Damage +200% Max Damage +250% Max Damage +300% Max Damage
Notes
  • Charge time is your weapon's shot delay (attack speed) plus 0.5 seconds.
  • Your weapon must be ready to shoot for this perk to start charging.
Tips
  • This perk is additive damage, meaning it will be diminishing other damage perks.
  • Recommended to use this perk with slow firing scoped rifles such as the AWM or the Luger (only if you have the scope).
Rooftop Camper
Rooftop Camper
Increases your damage, accuracy and range while on the roof. +5% Damage
+10% Accuracy
+15% Range
+10% Damage
+20% Accuracy
+30% Range
+15% Damage
+30% Accuracy
+45% Range
+20% Damage
+40% Accuracy
+60% Range
Notes
  • Being on the roof is required for this perk to activate.
Tips
  • Has a slightly higher damage bonus than Stopping Power, however requires you to consistently stay on the roof, which can hinder the damage output of most classes rather than improve it.
  • While most snipers don't benefit from the range and accuracy bonus, the extra damage bonus compared to Stopping Power can make it preferrable if you plan on rooftop sniping for most of the game.
  • You generally will not take damage while on the roof, meaning that Glass Cannon is a much better option over this.
  • Launchers that would benefit from more range would like this perk, as it is a mix of damage and range unlike the Long Range perk.
Critical Speed
Critical Speed
Each point of movement speed over 12 will increase your critical hit chance. +0.7% Critical Chance +1.4% Critical Chance +2.1% Critical Chance +2.8% Critical Chance
Notes
  • Calculations are based off of your current movement speed.
Tips
  • You will not benefit from this perk if you are standing still.
  • Provides +2.8%/+5.6%/+8.4%/+11.2% critical chance at 16 movement speed.
  • If you use this with Run N' Gun and Adrenaline, as well as probably Bullet Hell and the perks are prestiged, then this is a pretty good perk.
Critical Shock
Critical Shock
Scoring a critical hit will unleash chain lightning, dealing 100% critical damage. 1-8s cooldown based on Attack Speed. +1 Target +2 Targets +3 Targets +4 Targets
Notes
  • Chain lightning have 15% hit money.
  • The range of the lightning is 4-7 studs.
  • Does get increased by Head breaker
  • Pairs well with Heavy Bullets.
  • Critical Plus does NOT effect this.
Tips
  • Slow, hard-hitting weapons with critical chance benefit better than faster ones.
  • Usually used to assist with applying Arm Breaker during blood god.
  • Sometimes used with melee that has some crit chance if the crit shocks are able to one hit kill most zombies.
  • Very good with a crit Energy Rifle build, however a lot of perk slots and prestiges are recommended.
  • if you use skull combustion or Head breaker there will be a chance of the effects to activate if you hit a headshot with the shock and will register as a critical headshot.
    • A must use for crit sniper builds.
Cluster Bombs
Cluster Bombs
Your explosive grenades and launchers have a chance to spawn extra explosives upon detonation, dealing 80% damage with 50% radius. +7% Cluster Chance +14% Cluster Chance +21% Cluster Chance +28% Cluster Chance
Notes
  • Cluster bombs are affected by perks and mods.
  • Cluster bombs have 50% hit money.
Tips
  • Similar to the Fireworks perk, except it is unlikely to happen in exchange for being more powerful when it happens.
  • Can be efficient on Mortar due to being able to have Lucky Charm effect this and Shadow Gear at the same time.
    • If both perks are Prestiged the Cluster Chance is 39.2%
Shadow Supply
Shadow Supply
Refilling at least 20% ammo gives you unlimited ammo for weapons with detachable magazines for a short duration. +4 Max Duration +8 Max Duration +12 Max Duration +16 Max Duration
Notes
  • Duration scales based on the weapon's ammo reserve (e.g. 25% ammo reserve = 75% duration).
  • Hit money is disabled while under the effects of Shadow Supply.
  • Weapons w/ detachable mags reload the entire clip all at once.
Tips
  • Weapons that burn through their reserves quickly such as the M82 and the Freezethrower can benefit from this
  • Due to hit money being disabled while using this, it is generally not advised to use on fast firing weapons unless money is not a concern.
Critical Burn
Critical Burn
Gain critical hit chance for every unique DoT effect the target is affected by. Does not apply to projectiles or swung melee weapons. +2.5% Critical Chance +5% Critical Chance +7.5% Critical Chance +10% Critical Chance
Notes
  • Examples of DoT (Damage over Time) effects include burn, bleed, and poison.
  • The gained crit chance only applies to your gun. This will not give your DOT effects and equipment more crit chance.
  • This does not work on the first shot for weapons that apply DoT effects.
Tips
  • Most useful for fast firing weapons with short range, as it is unlikely that far away zombies will have any DOT on them at all, and slow weapons will suffer from wasting damage on overkill.
  • Would require a fire going through the entire round for this perk to be worth it.
  • RPG, Gas cans, molotovs, barb wire, M203, and RG6 are the most likely to be used to help provide DOT throughout the entire round.
  • Generally underwhelming, as the only "viable" gun with DoT effects is M249, but it requires Swamp Impossible mode.
Head Breaker
Head Breaker
Critical headshots have a chance to crit twice. +7% Super Critical Chance +14% Super Critical Chance +21% Super Critical Chance +28% Super Critical Chance
Notes
  • Super critical hits apply the critical multiplier twice. (Example: If the critical multiplier is x3, then the super critical multiplier is x9. If the critical multiplier is 5.5x, then the super critical multiplier is 30.25x.)
  • Works with center mass and limb breaker.
Tips
  • Very situational perk, however weapons with 20+ crit chance and fast attack speed benefit greatly from this perk.
  • This is probably the most underrated perk when it comes to crit builds as the damage amplifier is very strong but it's by chance,
  • This perk is a must if you're using the FAMAS, Vector or P90 for crit builds.
Shadow Strike
Shadow Strike
If stealthed for at least 1.5 seconds, gain 100% critical chance after breaking stealth. +5s Critical Duration +10s Critical Duration +15s Critical Duration +20s Critical Duration
Notes
  • Requires being invisible with the use of Ghost, Assassin, Ghost walker, or Smoke Bombs.
Tips
  • Using this with Ghost means not firing for roughly 18 seconds before getting up to 20 seconds of crit, so you will want around three people using this to have a 100% somewhat consistent uptime. You will also need a very coordinated team, a voice chat is recommended. Using smoke bombs and bait to compensate for mistakes is also recommended.
  • Using Assassin for this is not recommended since you are likely to accidentally fire another shot right after getting the kill that puts you in stealth, meaning you will leave stealth too early to be able to get Shadow Strike.
  • Can pair well with shadow supply.
Flanking Maneuvers
Flanking Maneuvers
Deal increased damage to enemies from behind. +20% Damage +40% Damage +60% Damage +80% Damage
Notes
  • Pretty good for tanksaw.
  • Works for imp (pretty niche perk).
Tips
  • A teammate using charmer and/or using elusive on yourself is a good way to be able to get behind zombies without being targeted, although you will be putting yourself in danger of being killed by boomers and toxics.
  • This can sometimes be useful if killing destroyers, as they will face towards the shop.
  • Can be used to deal a lot of damage to the swamp giant.
  • Except if you're doing these stratagies, avoid this perk.
Ice cold
Ice Cold
Your weapons cool faster and can withstand more heat. +10% Max Heat

+10% Heat Decay

+20% Max Heat

+20% Heat Decay

+30% Max Heat

+30% Heat Decay

+40% Max Heat

+40% Heat Decay

Notes
  • Only works with heat based weapons like the M2 Flamethrower and most of the mobile/secret shop weapons.
  • After the 5.4.0 update, this is the only perk to affect the reload speed of laser weapons, now known as heat weapons.
Tips
  • The max heat allows more heat before overheating, but does not affect the overall output per minute.
  • The max decay allows the heat weapons to cool down faster similar to how reload speed would affect the laser weapons before the 5.4.0 update.
  • Usually used on most heat weapons other than Laser Minigun, especially Laser Shotgun, in which is a must-use.
Hot harmony (1)
Hot Harmony
Increases your damage at high heat and increases your rate of fire at low heat. +7% Hot Damage

+15% Cold Attack Speed

+14% Hot Damage

+30% Cold Attack Speed

+21% Hot Damage

+45% Cold Attack Speed

+28% Hot Damage

+60% Cold Attack Speed

Notes
  • Only works with heat-based weapons.
  • When below 50% heat, you gain only the attack speed. When above 50% heat, you gain only the damage.
Tips
  • It is a much stronger version of Stopping Power or Bullet Storm depending on your current heat.
  • Effective on heat-based weapons.
Deadlygear
Deadly Gear
Increases the damage of your equipment. +4% Equipment Damage +8% Equipment Damage +12% Equipment Damage +16% Equipment Damage
Notes
  • Works on direct damage of things like molotov and gas can, as well things like sentrygun, landmine, and mortar damage.
  • Does not affect DOT effects.
  • This and other perks that affect damage of gears does not increase the damage that comes from wither.
Tips
  • Generally underwhelming perk, but used for gear builds when there's literally nothing else to add.
  • Can be used together with Gas Can or Molotov to kill zombies quickly.
  • Can also be used on Sentry Gun, Heavy Sentry, and Combat Drone to make sure zombies are taken down with little ammo usage.
Savage
Savage
Kills add bonus wither damage to your next melee knife, up to 400%. Lose 100% wither per attack. Your knife will no longer interrupt reload. +10% Wither Per Kill +20% Wither Per Kill +30% Wither Per Kill +40% Wither Per Kill
Notes
  • 100% Wither is equal to the max hp of a pale common zombie.
  • 200% Wither is equal to 2x the hp of a pale common zombie.
  • Only non-knife kills will give the wither to the knife.
  • It has a wither upgrade, but note that the damage from wither is not affected by damage and crit perks.
Tips
  • Zombies on high difficulties will kill you nearly instantly even when using blue perks, making any attempt to use a build with savage pointless.
  • It is often best paired when the zombie you are intending to melee isn't targeting you.
  • Can save you when you are out of ammo or are caught reloading.
Confidenthandling
Confident Handling
Disables your ability to aim down sights, but increases your accuracy and reload speed. Effects is reduced by 60% for weapons that can't aim. +20% Accuracy

+30% Reload

+30% Accuracy

+45% Reload

+40% Accuracy

+60% Reload

+50% Accuracy

+75% Reload

Notes
  • Bonus is reduced if you did not lose the ability to ADS from equipping this perk, meaning you would get 20% accuracy and 30% reload speed at lvl 4.
  • That means that this is reduced with Minigun or akimbo weapons, as those weapons already cannot ADS.
    • This is also reduced on the M203 from overkill pack and ice rifle as those cannot ADS.
Tips
  • This perk is mainly used for the Energy Rifle, as that weapon does not have a headshot multiplier so your shots do not need to be incredibly accurate.
  • This can be used on Launchers since they don't often need to be very accurate.
Shredder
Shredder
Shots against enemies will apply 1 stack of vulnerability. Each stack increases the damage the enemy takes by 1.5%. +4 Max Stacks +8 Max Stacks +12 Max Stacks +16 Max Stacks
Notes
  • Multiplicative with damage perks.
Tips
  • Can be decent for weapons with high fire rate and ammo capacity such as Minigun or Laser Minigun.
  • Most shotguns can quickly rack up Shredder stacks due to their high Bullet count.
Maximumoverclock
Maximum Overclock
Increases the attack speed, range, and velocity of your deployables. +5% Attack Speed

+10% Range

+10% Velocity

+10% Attack Speed

+20% Range

+20% Velocity

+15% Attack Speed

+30% Range

+30% Velocity

+20% Attack Speed

+40% Range

+40% Velocity

Notes
  • Does not affect DoT tick rate.
  • Increases Gas Can attack speed, meaning more direct attacks per second.
  • Does not affect Gas Can range.
  • This can also affect things like Bear Trap arm speed.
Tips
  • This is good with the Cannon, Tesla Coil, and Floodlights, as those have infinite durability.
  • The Cannon will attack more often and the pellets will travel farther and faster.
  • The Tesla Coil will attack more often and the range is much bigger which makes it easier to use all of the multi zap.
  • The extra attack speed with Frost Generator, the extra range on Heavy Sentry and Sentry Gun, and the extra velocity on Mortar are usually unwanted.
  • If you are using the Heavy Sentry with this perk, it is quite powerful, but will burn through it's ammo quickly.
Splitshot
Split Shot
Adds a chance to fire an additional projectile each shot. +5% Split Chance +10% Split Chance +15% Split Chance +20% Split Chance
Notes
  • The additional projectile doesn't consume ammo.
  • The split chance is, as the description says, per-shot. Not per-bullet.
  • 28% chance with a Level 4 Lucky Charm.
Tips
  • Powerful with weapons with high attack speed like the Aug, and is a good option for non-snipers.
  • Useful on Money Printing builds.
Elusivestrike
Elusive Strike
After not being targeted for 5s, gain increased critical chance. +2.5% Critical Chance +5% Critical Chance +7.5% Critical Chance +10% Critical Chance
Notes
  • Going to the rooftop doesn't prevent you from getting targeted.
Tips
  • Rifleman and Concealed Carry are preferred over this, but can still be a good option.
  • Used by a sniper behind allies or when there's a tank/player equipping Charmer.
Retaliation
Retaliation
After not taking damage for 4s, gain increased damage for 16s. +20% Damage +40% Damage +60% Damage +80% Damage
Notes
  • You need to take damage to start the 4 second timer again.
  • Can be triggered with Danger Close.
  • Can also be triggered with Untouchable without taking any damage
Tips
  • Can be rather risky to trigger consistently without other means of survivability.
  • very strong when paired with Danger close and Shockproof
Reckless Supply
Reckless Supply
Greatly increases the total amount of ammo you can hold, but you can no longer use ammo boxes during the night. +200% Max Ammo +250% Max Ammo +300% Max Ammo +350% Max Ammo
Notes
  • Does not affect the ammo of equipment.
  • Does not work on Compound Bow, Chainsaw, and M2 Flamethrower.
Tips
  • Good if used together with perks that refill your ammo (Headshot Stash, Scavenger, etc.)
Spiked Shield
Spiked Shield
The higher your resistance, the more damage you will deal. +6% Damage from Resistance +12% Damage from Resistance +18% Damage from Resistance +24% Damage from Resistance
Notes
  • If you want to calculate your damage bonus, take your bonus Resistance, and multiply it by the percentage of Spiked Shield to get your damage bonus.
Tips
  • Mainly used with melee and tank builds.
  • Best paired with Iron Leech, Rampage, Underdog, and/or any other perks that greatly increase your resistance.
  • Pacifist does work, but the damage reduction is larger than the damage increase.
  • You can also use Experimental Drink with maxed Hardened Skin upgrade for more damage.
First Strike
First Strike
Deal increased damage to enemies above 85% of their maximum health. +8% Damage +16% Damage +24% Damage +32% Damage
Notes
  • The best use case is builds intended for killing zombies in one shot. In this case, it can be considered as an effective damage perk.
Tips
  • Calculating how much damage you'll do before you start a night can help you decide if it is worth grabbing this perk. This perk's damage boost will not be reflected in the weapon stats.
  • High-damage weapons such as those in the category of sniper rifles will benefit the most from this perk. Some popular choices include M82, Energy Rifle, and AWM.
  • Although this is a niche strategy, you can also use this against Swamp Giant, though it is better to just take Glass Cannon perk and keep your distance if you are going to kill the Swamp Giant.
Executioner
Executioner
Deal increased damage to enemies below 35% of their maximum health. +30% Damage +60% Damage +90% Damage +120% Damage
Notes
  • Best case scenarios point to this perk not being substantially more effective than generic red perks, while also being very situational.
  • In the very best case scenario, a zombie will have effectively ~80.9% hp with Level 4 Executioner.
    • For comparison, a zombie's effective HP with Level 4 Stopping Power is 86%.
    • With Level 4 Glass Cannon, it is 78.125%.
Tips
  • Builds/weapons that favor a high fire rate will best compliment this perk.
  • This perk is effective against the Swamp Giant when at low health, as the damage increase will be drastically high.

Blue Perks (Defensive)

Blue perks increase the player's damage resistance, health/armor regen, and survivability.

Perk Description Level 1 Level 2 Level 3 Level 4
Juggernaut
Juggernaut
Take less damage from zombies. +15% Resistance +30% Resistance +45% Resistance +60% Resistance
Notes
  • How much % damage taken after bonuses is followed by the formula 100/(100+X) with X being the +% Resistance.
Tips
  • By itself, effectively reduces damage by 13.04%/23.07%/31.03%/37.5%.
  • Useful with melee and tank builds.
    • Though on melee builds, Rampage is preferred due to it providing a speed boost and health regen in addition to resistance.
  • Some zombies have resistance penetration. A berserker has 50% resistance penetration making 40% resistance turn into 20% resistance.
Equilibirum
Equilibrium
Regenerate armour during the night. Armour regeneration has a 10s cooldown. +2% Armour Regen +4% Armour Regen +6% Armour Regen +8% Armour Regen
Notes
  • You must have armor for this perk to activate.
  • Affected by Fast Forward perk.
Tips
  • With 400 max armour and lvl 4 Equilibrium you gain 24 armour every 10 seconds (2.4 armour a second).
  • With 400 max armour and 200 max hp and then adding level 4 Meat Shield, level 4 Reinforced Armour and level 4 Equilibrium, you will have 872 max hp and regen 54.936 max every 10 seconds.
  • You can use this while you are dead to regen armour, saving you from having to repair armour the next wave.
  • Meatshield allows the normal health to be regenerated, allowing for more regeneration.
Life leech
Life Leech
Regenerate health after every zombie you kill. +1.6 Health +3.2 Health +4.8 Health +6.4 Health
Notes
  • You must land a kill for this perk to activate.
Tips
  • Mainly used with melee.
Shock proof
Shockproof
Reduce damage taken from explosions and damage over time effects. Additionally reduces the duration of stuns. -60% Damage Taken

-60% Stun Duration

-70% Damage Taken

-70% Stun Duration

-80% Damage Taken

-80% Stun Duration

-90% Damage Taken

-90% Stun duration

Notes
  • Poison, Bleed, Napalm, Boomer's Explosion, and the Toxic puddle are considered indirect damage.
  • Good for Blood God strat against Boomers/Spongers/Miners/Electrics.
Tips
  • Useful when those types of zombies are present.
  • The direct damage from flamers is not counted, only the napalm effect they apply is affected.
  • Although it reduces the stun duration of electric zombies it is best to stay away from them.
  • Due to the very high damage that boomers and toxic puddles will do on higher difficulties, often shockproof is not enough to save you from them. It is instead usually better to just change your playstyle to avoid getting in range of those zombies and avoid using Shockproof.
EscapeArtist
Escape Artist
Escape to the shop after taking lethal damage. Gain 1 charge at the start of each night. +1 Max Escape Attempts +2 Max Escape Attempts +3 Max Escape Attempts +4 Max Escape Attempts
Notes
  • Gain full health, stamina, and armor after each escape attempt.
  • Perk counter indicate how many escape attempts remaining.
  • Does not start with max charges.
  • allow perk switching mid night
  • recharge itself when the night start as long as you have it equipped
Tips
  • While a popular choice amongst newer players, this perk is not very good as in most situations you should not be dying in the first place, and by using this over a damage perk, you are actively reducing your potential.
  • As a result, expect to be laughed at and/or votekicked by veterans of the game for using this perk as a safety net.
  • Synergizes with Undying and others one use perk like Death defier and Armor break
  • can be decently useful for tank but situational
Undying
Undying
After taking lethal damage you can keep fighting for a short time with unlimited ammo. +8s Duration +16s Duration +24s Duration +32s Duration
Notes
  • Die after Undying effect expires.
  • Changes death message to "[USERNAME]'s time ran out."
  • Activates before Escape Artist, and for each escape attempt.
  • Hit money is disabled when under the effects of Undying.
Tips
  • The unlimited ammo bonus is best paired with weapons with a low magazine and/or fast firerate as the weapon can be used extensively.
  • Mainly useful for early game where the waves are shorter.
Arm breaker
Arm Breaker
Critical hit will reduce direct enemy damage for 3s. -15% Direct Damage -20% Direct Damage -25% Direct Damage -30% Direct Damage
Notes
  • Blue Sparkles indicate reduced damage.
Tips
  • Weaker than level 4 Juggernaut, while also requiring you to crit the zombie. This perk is usually just considered a downgrade to Juggernaut.
  • Using this to support someone using melee is the main use, however it is extremely niche and often low impact so it is recommended to avoid using this perk.
Regrowth plus
Regrowth Plus
Increases your health regen and disables temporary health decaying during the night. +1 Health Regen +2 Health Regen +3 Health Regen +4 Health Regen
Notes
  • The health regen is every second.
Tips
  • This perk is usually just a downgrade to Life Leech, Vampirism, and Critical Heal. It has almost no impact on gameplay, and often you are better taking a damage perk anyways. It is hard to justify taking this perk unless a large buff occurred or a large amount of perk slots were added.
  • Restores more hitpoints over time than Equilibrium with fully upgraded Body Armor and Reinforced Armor.
Helathy Health
Healthy Health
Increases your health. +50 Health +100 Health +150 Health +200 Health
Notes
  • A flat bonus to max hp.
Tips
  • Tank builds as well as support builds with Life Link may enjoy this.
  • Synergises with Mist Walker on support builds.
Vampirism
Vampirism
Regenerate health through dealing damage. +1.25% Lifesteal +2.5% Lifesteal +3.75% Lifesteal +5% Lifesteal
Notes
  • Also works with throwable equipment as well as DoT effects. Does not work with deployables.
  • Lifesteal works like wither in that it scales off the max hp of a pale common zombie.
  • 5% lifesteal means you gain 5 hp when you do damage equal to a pale common zombie.
Tips
  • Often stacked with melee builds with Life Leech for more lifesteal.
  • Gives roughly the same hp as Life Leech on higher difficulties due to uncommons and specials having an extra hp multiplier.
  • Can be used with Overheal.
Static Discharge
Static Discharge
Release a wave of stunning electricity whenever you're attacked. 10s Cooldown. +0.4s Stun Duration +0.8s Stun Duration +1.2s Stun Duration +1.6s Stun Duration
Notes
  • You cannot stun a zombie that has already been stunned by this.
Tips
  • This perk is only really used on tanks with loads of perkslots. Otherwise, avoid this perk.
Time freeze
Time Freeze
Before you take lethal damage, freeze time for a few seconds. Charge refills 2 nights. +5s Frozen Time +10s Frozen Time +15s Frozen Time +20s Frozen Time
Notes
  • Activates before Escape Artist.
  • Stops zombies, in-game clock, and DoT effects.
  • Losing a life only counts as 1 night when recharging.
  • This perk is essentially a combination of Speedload, Lightweight, and Bullet Storm, as the perspective of the zombies is that the players have moved around a bunch, shot a bunch, and reloaded a bunch in a split moment
Tips
  • You can attempt to purposely activate this at specific times (such as boss spawning).
  • Will not save you from DoT debuffs unless you heal.
  • If you kill a lot of zombies on a high wave during time freeze, then a lot of zombies will spawn very quickly when time freeze is over. This can be very dangerous for your team, especially on maps where zombies can spawn near the shop.
  • Due to this only being able to happen once every two nights and potentially getting your team killed with the burst of zombies spawning after it ends... it is often better to just take a different perk.
Untouchable
Untouchable
Whenever you would take direct damage, dodge it in your current movement direction. 30s Cooldown. +1 Max Charge +2 Max Charge +3 Max Charge +4 Max Charge
Notes
  • Dodging with the cooldown above 0 seconds but below 3 seconds will reset it to 3 seconds.
  • can trigger frost armor and retliation
  • effected by fast foward
  • dashing take away small amount of armor (need verification)
Tips
  • Decent when paired with retaliation as it allow you to trigger the perk effects without taking damage
  • Pretty bad for baiting because of the 30 seconds cooldown
  • probably better than Escape artist as a safety net
Locked Down
Locked Down
Increases your resistance, health regen and armour regen per 10s for every locking perk equipped up to 4. +2.5% Resistance
+0.2 Health Regen
+0.4% Armour Regen
+5% Resistance
+0.4 Health Regen
+0.8% Armour Regen
+7.5% Resistance
+0.6 Health Regen
+1.2% Armour Regen
+10% Resistance
+0.8 Health Regen
+1.6% Armour Regen
Notes
  • The perk itself is also calculated.
Tips
  • Probably meant to be used with 3 locking yellow perks and money is power for a lot of perk value, but it actually ends up being pretty underwhelming.
Reinforced Armour
Reinforced Armour
Increases your armour. +15% Armour +30% Armour +45% Armour +60% Armour
Notes
  • Increases armour durability.
  • Some zombies have resistance penetration, which also penetrates armour resistance.
Tips
  • The perk will have a greater effect if you upgrade the armor's durability.
  • Works decently with perks like Equilibrium and the armour heal from supply crate, allowing you to get more out of them.
  • You can make 400 max armour into 640 max armour.
  • With a lvl 4 Meat Shield and lvl 4 Reinforced Armour, you will turn 640 max armour into 672 more max hp.
Armour break
Armour Break
Once per night, when your armour breaks, gain temporary health, and temporarily gain damage immunity and 50% bonus movement speed. +25% Temp Hp

+2.5s Duration

50% Temp Hp

+5s Duration

75% Temp Hp

+7.5s Duration

100% Temp Hp

+10s Duration

Notes
  • You must have armor at the beginning of the night for this perk to recharge.
Tips
  • Not as consistent as Death Defier, but has a longer duration.
  • Generally a low impact perk, so avoid using this.
  • Sometimes seen during blood god strat during early game for a tiny bit of delay.
Death Defier
Death Defier
Once per night, before you take lethal damage, temporarily become immune from all damage and regenerate 15% max health/s. +1.5s Duration +3s Duration +4.5s Duration +6s Duration
Notes
  • Invincibility is indicated by the light blue screen tint.
Tips
  • Regenerate 22.5%/45%/67.5%/90% of your max health by the time Death Defier expires.
  • Might be more reliable than Armour Break, and it has a better buff.
  • Usually seen on tanks.
  • Sometimes seen during blood god strat during early game for a tiny bit of delay.
Pacifist
Pacifist
Deal 25% less damage, but gain increased resistance. +40% Resistance +60% Resistance +80% Resistance +100% Resistance
Notes
  • How much % damage taken after bonuses is followed by the formula 100/(100+X) with X being the +% Resistance.
Tips
  • Do not use this on gear builds, even if gear isn't impacted, you dying does not matter since your teammates can use your gear anyways.
  • Tank builds also use this, but those are rarely seen due to requiring a specific team and good teamwork.
Heavy Tank
Heavy Tank
Gain resistance for every point of weight your held weapon has. +2.5% Resistance +5% Resistance +7.5% Resistance +10% Resistance
Notes
  • Upgrades/Perks that decrease weapon weight will negatively impact the perk effect.
Tips
  • Better than Juggernaut at 5 weapon weight.
  • The only weapon that can really use this well is the Minigun, and usually a Minigun would rather have another damage output perk.
  • A Minigun on wave 30 on nightmare can actually get more out of Equilibrium instead of Heavy Tank due to how long the waves are, even with a First Aid Kit.
  • Due to the reasons above, it is recommended to avoid spending perk points on this perk.
Frost Armour
Frost Armour
Not taking damage charges up a frost nova based on your armour. Taking damage with a max charge releases the nova, freezing nearby enemies. +60% Freeze/Armour +70% Freeze/Armour +80% Freeze/Armour +90% Freeze/Armour

Notes

  • Start charging frost after not taking damage for 1 second. A frost nova is ready when the frost charge reaches your current armour value.
  • The frost nova range is 64 studs
  • The frost nova will only active when the meter is full or when you take lose enough armor to match the meter
  • can't be triggered by Danger close however Untouchable can trigger this when you dash
Tips
  • Certain zombies are more resistant to the freeze.
  • effective against hordes and hunters.
Critical Heal
Critical Heal
Scoring a critical hit will make you regenerate health over 4s. +7 Health/4s +14 Health/4s +21 Health/4s +28 Health/4s
Notes
  • Duration refreshes if activated during the duration.
  • 7 hp a second at lvl 4.
Tips
  • Life leech and Vampirism with melee heal way more than Critical Heal, and generally adding Critical Heal on top is not as good as perks that increase output or resistance with melee.
  • A decent choice with Critical Heal is with the Freezethrower using Life Link to support a tank.
Life Infusion
Life Infusion
Killing an enemy has 40% chance to increase your maximum health. Lose 50% of this extra health at the start of each night. +1 Max Health +2 Max Health +3 Max Health +4 Max Health
Notes
  • Does not increase your current health if it procs.
    • Activates after Life Leech.
  • As soon as the clock hits 18:00, your max health is cut in half. Doesn't apply to your starter max HP.
Tips
  • Takes 58.4 kills on average to be equal to Healthy Health.
  • Useful for Grenadier, Run N Gun and melee builds.
  • Pairs well with Scavenger and Life Leech/Vampirism, as long as you have other perks to support this.
  • Do not use this on it's own, or if you don't take much damage, otherwise you are just gonna waste perk points.
Life Burn
Life Burn
Regenerate health through damage over time effects. +3% Lifesteal +6% Lifesteal +9% Lifesteal +12% Lifesteal
Notes
  • Like Vampirism, but applies to DoT damage only.
  • Mainly used with Trailblazer or Supernova.
Tips
  • Used on Trailblazer builds due to it essentially being a better Vampirism.
Supernova
Supernova
Overheating will trigger a fire nova, knocking back enemies and setting them alight. 8s Cooldown. +20 Radius +30 Radius +40 Radius +50 Radius
Notes
  • Can only be used with heat weapons like the M2 Flamethrower and most of the weapons from the mobile shop/secret shop.
  • Supernova has no initial explosion damage. Its fire DoT is its only source of damage to zombies.
  • Supernova’s DoT damage slightly decreases as the game goes on, but it almost always deals enough damage to kill common zombies throughout the game.
Tips
  • Supernova is quite difficult to use successfully without good gamesense and a good team. For the following reasons, make sure your team is backing you up.
    • This perk requires you to go into overheat a lot. Being in overheat will likely get you killed by zombies that survived or evaded the Supernova.
    • The weapons that work with this are generally underwhelming in terms of conventional firepower, making it difficult to deal with tanky zombies like Berserkers.
  • Long Burn and Fast Burn will increase the Supernova's DoT damage enough to kill zombies lategame.
  • Focus the rest of your perks on survivability.
    • Static Discharge can help set up zombies for a Supernova.
    • Knockback Blast with the Laser Shotgun can get zombies off of you before and after the Supernova.
  • Can be useful for brawn over brain..
Mechanicalleech
Mechanical Leech
Equipment kills restore your armor. +5 Armor +10 Armor +15 Armor +20 Armor
Notes
  • Any gear kills will refill your armour.
  • Some zombies have resistance penetration, meaning that armour is much less effective against them.
Tips
  • It is recommended to avoid this perk, as some zombies ignore or penetrate armour resistance, and instead get life leech, which is also useful for melee.
Meatshield
Meat Shield
Your armour is converted into health and armour regen is converted into health regen. +70% Conversion +80% Conversion +90% Conversion +100% Conversion
Notes
  • This does not work with most types of things that refill armour like Mechanical Leech and armour on kill upgrades.
  • This does work with the armour regen from Locked Down and Equilibrium. They will scale off your max hp instead.
  • You can also use Reinforced Armour to gain even more max hp.
Tips
  • This perk is mainly used by midgame melee builds and tank builds that have a lot of perk slots and prestiges. Recommended to avoid this perk unless you know what you are doing.
Overheal
Overheal
A portion of your excess healing is converted into temporary health. +50% Overheal +60% Overheal +70% Overheal +80% Overheal
Notes
  • Max temporary health is equal to your max hp
  • This perk does not affect healing that comes from other players, (If you have this perk and use a supply crate from someone else, this perk won't let you get overheal from it).
  • This perk works with the healing that comes from your perks as well as from your healing items (Players that use your Supply Crate can be overhealed if you have this perk equipped)
  • This perk does not work with Regrowth Plus, and Mist Walker and Rampage, nor does it work the hp regen from bodybuilding.
  • It actually works with Critical Heal and the healing from Carpenter, despite not working with Regrowth Plus and Mist Walker.
  • You cannot overheal the barricade.
  • You lose 0.5 temporary health per second.
  • This perk does not work with Equilibrium and Locked Down when using Meat Shield.
Tips
  • If you have someone using something like a gear build or airburst build for endgame, you can have them buy the supply crate with the HP refill upgrade and have them use this perk and place the supply crate under the tank. The tank will be able to get overhealed, by that Supply Crate.
  • Level 1 Overheal giving 50% overheal means that for every 100 healing while at max hp, you get 50 temporary hp, so it is recommended to level up the perk so that you get more temporary hp per healing.
  • You cannot get temporary hp from this perk if you are not at max hp and the healing doesn't bring you to max hp.
  • This also affects Overwatch.
  • This perk does not work with Escape Artist even if you have Field Medic.
  • If you equip Field Medic and Overheal while equipping Dying Wish, you will be able to overheal other people when you die.
  • Usually used with Overcharged.
Fieldmedic
Field Medic
Increases the potency of your healing effects and increases the use speed of consumables. +15% Healing

+15% Use Speed

+25% Range

+30% Healing

+30% Use Speed

+50% Range

+45% Healing

+45% Use Speed

+75% Range

+60% Healing

+60% Use Speed

+100% Range

Notes
  • This perk does not affect healing that comes from other players, (If you have this perk and use a supply crate from someone else, this perk won't let you get more healing from it)
  • This perk does not work with Regrowth Plus, Mist Walker, and Rampage, nor does it work the hp regen from bodybuilding.
  • It actually works with Critical Heal and the healing to self from Carpenter, despite not working with Regrowth Plus and Mist Walker.
  • (Needs to be tested if it also affects carpenters repair to barricade, as that could possibly cause you to get a double increase to the self heal from carpenter)
  • This perk does not work with Equilibrium and Locked Down.
Tips
  • If you have someone using something like a gear build or airburst build for endgame, you can have them buy the Supply Crate with the HP refill upgrade and have them use this perk combined with Overheal and place the Supply Crate under the tank. The tank will be able to get healed a lot by that Supply Crate and be able to be overhealed.
  • This also affects Overwatch.
  • If you equip Field Medic and Overheal while equipping Dying Wish, you will be able to overheal other people when you die.
  • Really good perk for buffing Life Leech and Vampirism on melee builds for even bigger lifesteal effects
Borrowedtime
Borrowed Time
Instead of taking all damage instantly, take a percentage of it over 8s instead. 60% Damage Over Time 70% Damage Over Time 80% Damage Over Time 90% Damage Over Time
Notes
  • Shockproof doesn't decrease indirect damage(zombie damage, toxic puddles) turned into DoT by Borrowed Time.
Tips
  • Can make it rather difficult to gauge/know if you're taking lethal damage.
Builttolast
Built To Last
Increases the resistance of the barricade. When the barricade is destroyed, gain a percentage of the barricade's max health as temporary health. 15% Barricade Resistance

+2% Temp Hp

30% Barricade Resistance

+4% Temp Hp

45% Barricade Resistance

+6% Temp Hp

60% Barricade Resistance

+8% Temp Hp

Notes
  • After Barricade is destroyed, gain temporary health equal to Barricade's health.
Tips
  • Can be good to pair with Bunkered Down as that perk loses its effect when the barricade is destroyed.
  • Does not reduce the damage of the barricade's Barbed Wire upgrade.
Iron Leech
Iron Leech
Kills grant a stack of Iron Leech, which increase your resistance by 2.5% per stack. Lose 1 stack every 5s. +8 Max Stacks +16 Max Stacks +24 Max Stacks +32 Max Stacks
Notes
  • Because you will lose your Iron Leech stack every 5s, you have to kill zombies continuously in order to maintain good resistance.
Tips
  • This perk works just like Rampage, except that it works on all kills, in exchange for losing stack even when you are killing zombies. However, loss of stack won't be much of an issue if you can kill zombies quickly.
  • Just like Rampage, it works well with melee.
  • You can pair this perk with Spiked Shield for damage buff, though standard bullet perks will yield more DPS on guns.
Deflection
Deflection
Every 0.4s, taking armour damage has a chance equal to your critical chance to deflect the attack and grant invulnerability for 1.5s. 12s cooldown. 100% Cooldown Speed 200% Cooldown Speed 300% Cooldown Speed 400% Cooldown Speed
Notes
  • Requires a significant number of perk slots to outperform other tank builds.
  • A small ding sound will be heard when Deflection activates.
  • Does not proc on "true damage." This includes Borrowed Time damage, DoT damage, Electric zombie zap attack.
Tips
  • Will also make you invulnerable to Borrowed Time damage.
  • Dual Sai is a cheap early-game option that can reliably proc Deflection.
  • Fast Forward will reduce the cooldown.
  • Best used with perks/mods that increase the critical chance, such as Ravage perk and NVG's Weak Spot upgrade.
Thorns
Thorns
Kills grant stacks of Thorns up to 200. Taking direct damage consumes 1 stack and reflects damage back to the enemy. +1 Stack +2 Stacks +3 Stacks +4 Stacks
Notes
  • Hits on zombies with Thorns grant 50% hit money.
  • Needs more information. (What other perks does it interact with, how much damage is reflected, what types of kills)
Tips
  • Unless zombies are consistently at low health when they start attacking you, you will inevitably run out of stacks as a pure tank build.
    • Consider using this perk on builds that have lots of health, but can also fight back (Melee is the best for this.)

Green Perks (Utility)

Green perks give the player useful miscellaneous buffs, such as increased movement speed, stamina, and weight. Many green perks also increase the effectiveness of certain equipment, and some even provide alternative playstyles or unique buffs.

Perk Description Level 1 Level 2 Level 3 Level 4
Lightweight
Lightweight
Increases your movement speed. +3% Speed +6% Speed +9% Speed +12% Speed
Notes
  • Additive to your current movement speed.
  • Also affects sprint speed.
Tips
  • You can outrun zombies in easy mode except for the crawlers.
  • On higher difficulties, some zombies outrun you even if you are sprinting, especially on later waves and during blood nights. Toxic puddles on high difficulties can also boost the speed of zombies, as well as when a boss is alive.
  • Usually seen with the Trailblazer build.
Charmer
Charmer
Increases the radius zombies will target you. +12.5 Detection Radius +25 Detection Radius +37.5 Detection Radius +50 Detection Radius
Notes
  • Players within this distance from you in studs are ignored.
  • If this and Elusive are both equipped, then charmer will be on until you reach 30% hp, then you will be elusive until you get above 90%, returning to charmer. This process repeats.

Tips

  • This perk is pretty much mandatory for tank builds as zombies will be attracted to the tank rather than the frontliners instead.
  • You can lower the range of charmer in the settings.
Elusive
Elusive
Decreases the radius zombies will target you. -12.5 Detection Radius -25 Detection Radius -37.5 Detection Radius -50 Detection Radius
Notes
  • You are ignored while being this far from another player in studs.
  • Useful for certain players in Blood God strat.
Tips
  • Can be used if someone else is tank oriented and can not use Charmer.
  • You can lower the range of elusive in the settings.
Marathon Man
Marathon Man
Increases your maximum stamina. +100 Stamina +200 Stamina +300 Stamina +400 Stamina
Notes
  • A flat bonus to max stamina.
Tips
  • On early waves, this will often do more than Recovery Man just by itself.
  • Works well with Escape Artist, due to the fact that an escape will fully refill your stamina.
  • Due to bait builds being weaker on higher difficulties, this perk is mostly used when trying to beat the pacifist or brawn over brain challenge on normal mode.
Pack Mule
Pack Mule
Reduces the effectiveness of movement speed penalties. -20% Speed Penalties -40% Speed Penalties -60% Speed Penalties -80% Speed Penalties
Notes
  • At max weight you move 25% slower without this perk.
  • Also reduces the slowdown from freeze, bleed, poison, drench wraith slow, and walking in swamp water.
Tips
  • Effectively at max weight your movement speed penalty is 20%/15%/10%/5% instead of 25%
  • Default speed is the same as Lightweight when your weight is 60%. When you also include that Pack Mule resists the other speed debuffs, it means that Pack Mule is stronger than Lightweight when your weight is 60% of your max weight or higher.
Shadow Gear
Shadow Gear
Adds a chance to not consume equipment. Disables picking up deployed equipment. +15% Shadow Chance +20% Shadow Chance +25% Shadow Chance +30% Shadow Chance
Notes
  • Shadow equipment is not consumed.
Tips
  • Specializing in equipment is recommended.
  • If you combine prestige Shadow Gear with prestige Lucky Charm, you'll have a 42% chance to shadow gear. That means that almost half your gear will get shadowed. When you combine that with the fact that you can shadow gear that has already been shadowed, this means you can have more than double the amount of gear.
Lucky Charm
Lucky Charm
Increases the chance for random effects to occur. Effect is reduced by 50% for critical chance. +16% Random Chance +24% Random Chance +32% Random Chance +40% Random Chance
Notes
  • Multiplicative with chance percentages.
  • Halved effect for crit chance means that at level 4 it increases crit chance by 1.2x instead of 1.4x
Tips
  • May be beneficial if you run with multiple random chance perks such as Skull Combustion and criticals.
  • Critical chance are also considered random effects and will scale accordingly to this perk.
  • Often extremely underwhelming, especially when Lucky Charm and the other chance perks are not level 4.
  • Due to almost no endgame weapons being able to use this well on nightmare and below and with it being a locking perk, it is recommended to avoid this perk completely.
  • Usually seen with Grenadier builds.
Leg Breaker
Leg Breaker
Critical hits will slow enemies for 1.5s. +10% Enemy Slow +20% Enemy Slow +30% Enemy Slow +40% Enemy Slow
Notes
  • Hitting a zombie that is already leg broken will take away the old leg breaker and apply the new one, essentially refreshing the duration.
Tips
  • Automatic weapons with a fast firerate and decent critical chance can activate the effect very frequently.
  • If your weapon is at 1 or 2 pierce, it is recommended to add a pierce mod to make it 1.01 or 2.02 pierce so that you can hit an extra zombie.
  • Might be able to make bait builds viable on higher difficulties, but it would require a lot of teamwork and is likely to not work due to some of the uncommons countering bait builds very strongly.
Run N' Gun
Run N' Gun
Reduces stamina consumption by 15% and allows sprinting with weapons for reduced speed. 25% Sprint Speed 50% Sprint Speed 75% Sprint Speed 100% Sprint Speed
Notes
  • Normally without this perk you would briefly unequip your held weapon. (Except with the knife)
  • You will sprint slower while holding a weapon with this unless you have the lvl 4 version.
  • Reduces Stamina consumption by 15%, resulting in 17.65% more stamina.
Tips
  • Effectively sprint speed is at 10%/20%/30%/40% when sprinting with a held weapon.
  • Could be valuable to pair this with Bullet Hell and Critical Speed as well as Adrenaline. Does significantly better when the perks are prestige and more perk slots are available.
  • Best use for this is on the brawn over brains challenge.
Recovery Man
Recovery Man
Increases your stamina regen and reduces the time it takes for your stamina to start regenerating after sprinting. +2 Stamina Regen
-30% Regen Delay
+4 Stamina Regen
-45% Regen Delay
+6 Stamina Regen
-60% Regen Delay
+8 Stamina Regen
-75% Regen Delay
Notes
  • Increases stamina regen.
  • Original delay before stamina regens is 3 seconds, this can reduce it all the way down to 0.75 seconds.
Tips
  • This perk gives an average speed increase similar to Lightweight. Can be useful for pacifist/brawn over brain.
  • Usually seen with trailblazer perk builds
Long Burn
Long Burn
Increases the duration and damage of damage over time effects. +25% Duration
+25% Damage
+50% Duration
+50% Damage
+75% Duration
+75% Damage
+100% Duration
+100% Damage
Notes
  • Increases the duration between ticks of damage from your DoT effects meaning you have fewer hits of DoT a second.
  • Duration now also affects DoT hit money in a way that makes it so this no longer reduces the hit money gain per second.
  • Napalm, Bleed, and Poison are the only DoT effects.
  • Each tick of DoT now does more damage
  • This does not change the duration or damage of gas cans, molotovs, gas grenades, caltrops, etc. It only affects the DoT that those can apply.
Tips
  • This perk does not actually change your damage per second with DoT effects, since the increase in damage is countered by the fewer ticks of damage a second
  • Gas cans and molotovs and gas grenades, etc... have 2 different types of damage, their direct damage which is affected by perks like Implosion and Danger Close and Deadly Gear, and the napalm/poison/bleed that they can apply after applying direct damage. Applying another direct hit simply refreshes the time left on the DoT effect.
  • This perk is generally underwhelming, so it is recommended to avoid it. It can be useful with the Barbed Wire to help with getting more hit money and killing zombies early to midgame.
  • This increases the damage of the Supernova explosion as well as the Supernova DoT afterwards.
Fast Burn
Fast Burn
Decreases the total duration of damage over time effects. Damage dealt is not reduced. -16% Duration -24% Duration -32% Duration -40% Duration

Notes

  • Reduces the time between each tick, resulting in more ticks per second.
  • Duration now also affects DoT hit money in a way that fast burn no longer increases hit money per second.
  • The total duration is shorter.
  • Napalm, Bleed, and Poison are the only DoT effects.
  • Due to the same damage per tick but more ticks per second, this perk will actually increase your damage per second with DoT effects, up to 66.67% more damage per second at lvl 4 from DoT effects.
Tips
  • If you only apply the DoT once, then this perk will not actually increase your output, as the same damage is done over time, it just happens faster.
  • This does not affect duration and direct damage of things like gas cans, molotovs, etc.
  • Since most of the damage with gas cans and molotovs is through the direct damage and not the napalm, this is often an underwhelming damage increase.
  • Mainly used with Trailblazer, and sometimes Barbed Wire if hit money is not important but killing zombies faster is.
Slow Burn
Slow Burn
Increases the slowing power of damage over time effects. +5% Enemy Slow +10% Enemy Slow +15% Enemy Slow +20% Enemy Slow
Notes
  • Affects poison, bleed, and napalm.
  • Additive with the innate DoT slow.
  • Cannot stack multiple slow burns.
Tips
  • Launchers that inflict poison (M203) or bleed (RG-6) or fire (RPG-7) are recommended.
  • Gas cans and molotovs are also a good choice with Slow Burn.
  • Trailblazer on brawn over brain benefits well from Slow Burn.
  • Useful for Trailblazer earlygame to let the zombies not on fire catch up.
Trailblazer
Trailblazer
Leave a trail of flames while sprinting that will set enemies alight. Additionally reduces stamina consumption by 25%. +0.5 Duration +1.0 Duration +1.5 Duration +2.0 Duration
Notes
  • Applies Napalm that burns over 3 seconds. The damage scales with the current wave and difficulty.
  • The damage is calculated with =((50*X)+50)*(1+Y/200), with X being the current wave and Y being the HP increase from the difficulty (0 for normal, 50 for hard, 100 for nightmare, 200 for impossible) (Example: 150 damage over 3 seconds on wave 2 normal, 375 damage over 3 seconds on wave 4 nightmare.
  • Reduces stamina consumption by 25%.
Tips
  • Not very effective past Hard difficulty.
  • Usually used as a way to beat the Brawn Over Brains challenge.
  • Use with Adrenaline earlygame and you can have nearly infinite stamina.
  • Use with Lightweight and Slow Burn to outrun more zombies.
  • Stacks with Run N' Gun for even further reduced stamina consumption.
Tower Defense
Tower Defense
Increases the ammo and duration of your equipment. +10% Ammo and Duration +20% Ammo and Duration +30% Ammo and Duration +40% Ammo and Duration
Notes
  • Increases the Effect Duration, Durability, Explosions, AoE Duration, and Ammo.
Tips
  • Specializing in equipment is recommended.
  • With Landmines and Trip Mines, having level 2 or higher with 3 explosions will turn it into 4 explosions (3.6 rounds up to 4).
  • You can get gas can from 40 seconds to 56 seconds of duration with this. Other items like Molotovs, Gas Grenades, Frost Generator, and Heal Grenades work similar.
  • Caltrops, Bear Traps, Sentries and Mortar can also be used more before being broken.
  • Propanes, Tesla coils, Shurikens, Kunais, Zombie bait, Pipe Bomb, Cannons, along with some others do not benefit from this.
  • Deployable Ammo, Supply Crate, Sentry Gun, and Heavy Sentry will have more ammo.
  • Some grenadiers use this to increase the duration of Zombie bait and Pipe Bombs
Lightning Charge
Lightning Charge
Increases the speed in which your equipment recharges. +12.5% Charge Speed +25% Charge Speed +37.5% Charge Speed +50% Charge Speed
Notes
  • Increases the amount of equipment you get per night.
  • Increases that are not whole numbers can add up with the following nights in order to create a full extra equipment.
  • Affects the "Grenadier" perk aswell
Tips
  • Specializing in equipment is recommended.
  • This perk loses value on wave 30 if you already have the max amount of gear on the ground and in your inventory, but is very useful with gear otherwise.
  • Example: With lvl 4, you can get 3 gas cans and molotovs every night instead of 2.
  • Example: With lvl 3, you will get 3 gas cans and molotovs on 3 out of 4 nights instead of 2.
  • Usually seen on Grenadier builds to increase recharge on all throwables such as Bait
Concussive Shots
Concussive Shots
Your next headshot every 2.5s will stun the enemy. +0.4 Stun Duration +0.8 Stun Duration +1.2 Stun Duration +1.6 stun duration
Notes
  • Headshot does not need to kill.
  • You cannot stun a zombie that has already been stunned by this.
Tips
  • Ineffective later on due to the amount of zombies present.
  • Can be useful during early game with the USP, especially if hunting special zombies on a budget.
  • Useful for the Chainsaw Massacre mutation on early waves
Dying Wish
Dying Wish
Restore the health, armour, stamina and ammo for all teammates on death. +20% Restoration +40% Restoration +60% Restoration +80% Restoration
Notes
  • Escape Artist does not activate this perk.
  • This will only refill the ammo of weapons that people are currently holding. If you are not holding your weapon out when it happens then the ammo will not be refilled.
Tips
  • Niche perk that is generally only seen on good teams due to requiring coordination to be useful, as well as self sacrifice. Mainly for the early game, as it can refill lots of ammo for your teammates.
  • Mostly seen during blood god strat, as it refills the ammo and hp of the blood god as well as the supporters.
  • Can be seen sometimes during mid game when there is a tank, to refill their hp and armour in emergencies.
  • If you have prestige Dying Wish and prestige Field Medic equipped, you will be able to heal 128% hp. If someone is at max hp and you have prestige Overheal, you will be able to get them to max temporary hp, as 125% hp is needed for 100% temp hp with prestige Overheal.
Weightlifter
Weightlifter
Increases your maximum weight limit. +2 Max Weight +4 Max Weight +6 Max Weight +8 Max Weight
Notes
  • The maximum effectiveness of movement speed from this perk is also increased.
  • This perk is the opposite of a yellow perk, as it causes you to need more money to max out.
Tips
  • Getting current weight over max weight slows you to a crawl and reduces your damage by 75% (possible with Career Mode).
  • Mainly used for gear builds.
Guardian Angel
Guardian Angel
Once per night, swap places with a nearby teammate who is about to die. Both players gain damage immunity for 5 seconds. +24 Range +48 Range +72 Range +96 Range
Notes
  • This activates before Escape Artist, Undying, and Time Freeze.
  • The perk icon will darken in the ui to indicate that it's been used up.
  • Both players will be wiped of DoT debuffs and freeze debuffs on swap.
Tips
  • This perk is extremely niche and is only seen as a run saver in impossible Blood God strats against Berserkers.
  • It is best to keep this perk at lvl 2, any higher and you are likely to waste the perk on the sacrifices for the blood god instead of keeping it for the blood god.
  • You can lower the range of guardian angel in the settings.
  • Usually seen with Supporter perk builds
Heavy Concussion
Heavy Concussion
Increases the duration of your stun effects. +12.5% Stun Duration +25% Stun Duration +37.5% Stun Duration +50% Stun Duration
Notes
  • Can also extend the stun duration of Air Burst.
Tips
  • Usually only used with the Air burst perk.
  • If not using the Air Burst perk, it is generally very underwhelming.
  • Does not work with Bear Traps, as those are snare instead of stun
Back Breaker
Back Breaker
Critical shots will knock enemies back. +2.5 Knockback Power +5 Knockback Power +7.5 Knockback Power +10 Knockback Power
Notes
  • Zombies are knocked back in studs.
  • Can only activate 3 times per zombie.
Tips
  • As with all crit conditional perks, dealing crits is required for this perk to be of use.
  • Super niche perk, usually only seen with the Freezethrower or M2 flamethrower supporting a tank.
Carpenter
Carpenter
Being near the barricade at night will repair it, as long as it has not been recently damaged. 20% of the repair also heals you. Repair stacks with other players, but at 50% efficiency. +10 hp/s Repair +15 hp/s Repair +20 hp/s Repair +25 hp/s Repair
Notes
  • Repairs start if the barricade has not been damaged for 3 seconds.
  • Barricade can not be repaired if its torn down.
Tips
  • Useful for mid game and beyond when your team will be stuck behind the barricade.
  • On higher difficulties, it is very difficult to keep zombies off the barricade. Combined with their higher damage, it results in this perk usually not doing very well. If you are able to keep zombies off the barricade on high difficulties, then this perk would not be helping you win because you would already be winning.
  • Not useful on the pacifist challenge.
  • Useful for tanking, as the 20% repair bonus towards healing you can outclass Regrowth Plus. It also can repair you even when the barricade is at full HP.
  • Can be seen with Supporter perk builds
Weapon Hoarder
Weapon Hoarder
Decreases the weight of your weapons. Weight cannot be reduced below 1. -1 Weapon Weight -2 Weapon Weight -3 Weapon Weight -4 Weapon Weight
Notes
  • Does not affect equipment.
Tips
  • Useful if you have a lot of weapons in your inventory to lower their weight, however having more than 1 weapon is generally not a good idea, as your output is almost the same but you miss out on gear and the weapons also cost a lot.
  • The reduced weight will affect Concealed Carry, Heavy Impact (as it affects your total weight), and Heavy Tank.
  • Mainly used for crit Energy Rifle/crit Laser Minigun (Prestiged).
Freeze Frame
Freeze Frame
Killing a zombie gives you a stack towards Freeze Frame. After reaching 40 stacks, your next headshot kill will freeze time. +1s Frozen Time +2s Frozen Time +3s Frozen Time +4s Frozen Time
Notes
  • You must deal the killing blow for this perk to have a chance to activate.
Tips
  • Can be timed due to it being based on the next headshot kill, which could be used strategically to wipe out a wave of zombies/a boss or to gain some extra hit money.
Zombie Virus
Zombie Virus
Zombies have a chance to become weaker. +2.5% Virus Chance +5% Virus Chance +7.5% Virus Chance +10% Virus Chance
Notes
  • Zombies affected by this perk will have a light green skin tone and will have the low hp and low damage of a blue common zombie, with the low speed of a green common zombie. They are essentially zombies with low speed, low hp, and low dmg.
  • Works with common and uncommon zombies.
  • Since infection is a type of zombie color, special zombies are not affected.
Tips
  • 6 players with a Level 4 perk will have a total of a 60% chance of infection. 84% chance if all 6 have lvl 4 Lucky Charm too.
  • Due to this slowing zombies, you will deal with fewer zombies per minute if you are farther back, lowering your kills by a bit.
  • Due to this lowering the hp of zombies combined with the slowing zombies, you will also likely get less hit money
  • It is best to treat this similar to end mods, where you only use it in the endgame due to the reduced kills and hit money you would have if you used it during midgame.
Life Link
Life Link
Share 33% of the damage dealt to nearby allies. This damage cannot reduce you below 25% health. +16 Range +32 Range +48 Range +64 Range
Notes
  • You are essentially letting other people tap into your max hp.
  • If you are using Life Link, it does not matter if you are using Glass Cannon or resistance perks, it will not affect how much hp you lose when the person you are linked to takes damage, and it does not affect their resistances.
  • You will be linked to everyone in range.
  • Once you are below 25% hp, you are no longer linked, and will link back up once you are above 25%
Tips
  • Example: They take 20 damage, but it gets cut in half to 10 because they have 100% resistance. They will lose 6.66 hp and you will lose 3.33 hp.
  • You want this perk at lvl 2 or lower if using during blood god, otherwise you will waste it on sacrifices.
  • You can control the range of this perk in the settings.
  • Generally an underwhelming perk, recommended to avoid unless you know what you are doing.
  • If multiple people are attempting to use this perk, the closest life link user is the one that gets linked, the other will not be linked until all the closer ones are below 25% hp or get farther away.
  • Good with Mist Walker Ghost to help keep an Avenger user or tank alive.
  • Usually seen on Supporter perk builds
Ghost
Ghost
After not attacking or being targeted for 15s, enter stealth. Stealth is broken upon attacking or getting detected. 12 Detection Radius 8 Detection Radius 4 Detection Radius 0 Detection Radius
Notes
  • A timer is located at the bottom right (on top of the ghost perk) indication how much time before the perk activates.
  • If you are targeted or shoot/melee while Ghost is in cooldown, the cooldown will reset.
  • Your character will be semi-transparent once this perk is active.
  • You can deploy equipment without breaking invisibility.
Tips
  • Can used to deploy gear in a middle of a horde safely.
  • Can be used with Mist Walker and Shadow Strike.
  • You cannot light gas cans without leaving stealth, as that would require you to shoot your gun. You can have other people light them for you though.
  • If you have lvl 3 or lower with Ghost and a zombie gets close enough, you will be forced out of stealth
  • Usually seen with Supporter perk builds
Knockback Blast
Knockback Blast
Your shotgun shots will knock enemies back and have increased range. +3 Knockback Power

+10 Shotgun Range

+6 Knockback Power

+20 Shotgun Range

+9 Knockback Power

+30 Shotgun Range

+12 Knockback Power

+40 Shotgun Range

Notes
  • Can only activate once per zombie per shot.
  • Knockback power is measured in studs.
  • You can only knockback each zombie 4 times, with every successive knockback after the first dealing only 75/50/25% of the knockback.
Tips
  • Increasing range is good for shotguns which most are often saddled with the disadvantage of having a short range. The knockback is also good for keeping zombies away from you.
  • It is not advised to use this perk on maps such as Canyon or Underground, as Knockback Blast can knock zombies, including Destroyers, past the barricade.
Air Burst
Air Burst
Your mid-air explosions will stun enemies. The stun duration is doubled for equipment. +0.4 Stun duration +0.8 Stun duration +1.2 Stun duration +1.6 Stun duration
Notes
  • Explosive projectiles will explode in mid-air at maximum range.
  • Zombies can only be stunned once from this perk.
  • This perk does not work with the direct hit perk, as you are not allowed to hit anything to be able to airburst.
Tips
  • CQB Mods can lower the range of your launchers to allow you to stun zombies much closer to the shop.
  • You can also airburst near the zombie spawn to get a lot of kills using rooftop camper or long range perks, and/or range upgrades.
  • This perk allows you to double or triple your dps with launchers due to allowing you to hit the same zombies multiple times while hitting new ones, while also providing a stun that makes it take longer for each zombie to reach the shop, essentially lowering the amount of zombies that your team has to deal with each minute, while also getting them lower to be easier to deal with.
Technician
Technician
Increases the maximum amount of equipment you can place and hold. +12% Max Amount +24% Max Amount +36% Max Amount +48% Max Amount
Notes
  • Does not increase the amount of equipment you get per night, nor does it increase their duration.
  • Allows you to store more gear on the ground as well as more gear in your inventory.
  • Decimal numbers will round, 4.49 would round to 4 and 4.5 would round to 5
  • The opposite of lightning charge. It does not help at all for waves 1 through 29 in terms of increasing your output with gears, but it allows you to store more gear on the ground and the inventory for wave 30. Generally not as common in gear builds due to having no effect on output per night
  • This will however increase your output if you are using Tesla Coils or Cannons, as those have infinite ammo. The Cannon and Tesla Coil are a bit underwhelming however, and also require a gamepass to be able to use.
Tips

Level 3 technician versus level 4 Technician:

1 to 1 . 1 to 1

2 to 3 . 2 to 3

3 to 4 . 3 to 4

4 to 5 . 4 to 6 (improvement with level 4)

5 to 7 . 5 to 7

6 to 8 . 6 to 9 (improvement with level 4)

Ammo logistics
Ammo Logistics
Being near the shop at night will automatically refill the Ammo Box. +12 Ammo per 10s +24 Ammo per 10s +32 Ammo per 10s +48 Ammo per 10s
Notes
  • You have to be somewhat close to the shop for this to be working.
  • Will also refill the roof ammo box while refilling the normal one, but the roof ammo box refills 4x slower, resulting in 48 ammo for the lower box and 12 ammo for the top box every 10 seconds with Level 4 Ammo Logistics.
  • Can be stacked with other players with no efficiency penalty.
Tips
  • The cost of ammo that this can save can beat the money that Survival Contract will give, while also not locking allowing for good perks in the endgame.
  • Can be useful sometimes for the early and middle game.
Gearinfusion
Gear Infusion
Killing an enemy has a 30% to restore ammo in your deployed equipment. Ammo restoration is reduced by 75% for your explosives. +0.25% Ammo Restored

+1 Max Restore

+0.5% Ammo Restored

+2 Max Restore

+0.75% Ammo Restored

+3 Max Restore

+1% Ammo Restored

+4 Max Restore

Notes
  • This works for Heavy Sentry, Sentry Gun, Deployable Ammo, Frost Generator, Mortar, Supply Crate, and Combat Drone.
  • Mortar and Frost generator are affected by the 4x reduction to ammo restoration.
Tips
  • This can be a useful perk for some gear builds, mainly for the Heavy Sentry, Sentry Guns, and Mortar.
Supplyexpert
Supply Expert
Increases your interaction speed and ammo efficiency. +50% Interaction Speed

+25% Ammo Efficiency

+100% Interaction Speed

+50% Ammo Efficiency

+150% Interaction Speed

+75% Ammo Efficiency

+200% Interaction Speed

+100% Ammo Efficiency

Notes
  • At lvl 4, this perk makes you take 2x less ammo from the ammo box and interactions will be 2.6x faster.
  • You will still refill heavy sentries by the same amount from your weapon, but since you got the ammo into your weapon while taking less ammo from the ammo box, it makes refilling heavy sentries much less punishing to the ammo box.
Tips
  • Because this is a locking perk and is unlikely to be a good perk for endgame, it is recommended to avoid this perk.
  • If you have 6 heavy sentries on your team with the upgrade that allows for refilling then you can have one person use this perk to allow for faster refilling on the heavy sentries as well as using less ammo from ammo box to refill them.
Overwatch
Overwatch
Lethal shots from 60 studs or greater restore the health, armor, and stamina of all allies within 50 studs of the target. +4 Health

+4 Armor

+8 Stamina

+8 Health

+8 Armor

+16 Stamina

+12 Health

+12 Armor

+24 Stamina

+16 Health

+16 Armor

+32 Stamina

Notes
  • Kill a zombie that is farther than 60 studs and any players within 50 studs of that zombie get the restores.
Tips
  • Recommended to avoid as this is mostly useless for early and mid game, and for endgame it usually a bad idea to have someone that far away from shop.
  • If someone is doing a bait/tank build hybrid endgame and you have Energy Rifle then this can unironically be a good perk to support them.
Afterimage
Afterimage
Entering stealth spawns a shadow clone of yourself that can be used to distract nearby zombies. 25s cooldown. Cooldown is disabled while a shadow clone is active. +3s Duration +6s Duration +9s Duration +12s Duration
Notes
  • The cooldown will not count down if any shadow clone is on the map.
  • Also counts for the 30s zombie bait timer.
  • The clone essentially acts as a player with infinite hp that will despawn after a short while. If you use Charmer it will copy your charmer. If you use Elusive it will not copy your elusive and instead be regular.
  • The clones have a bonus 16 lure radius so that you can be near them and not get targeted.
Tips
  • If you have 5 players using this at lvl 4 then you can have 60 seconds of clones and then 25 seconds for everyone to recharge their clones.
  • If you have the Ghost perk equipped and are not in stealth by 18:00 then you will automatically stealth regardless of your stealth cooldown, which can cause a clone to spawn as soon as the round starts if the clone is not on cooldown.
  • Recommended to avoid this perk as it has low impact usually, and with a good team it is still mediocre even with good coordination.
Grenadier
Grenadier
Kills with launchers have a chance to refill your grenades by 12% of a night. You can also hold more grenades. +2.5% Refill Chance

+20% Max Grenades

+5% Refill Chance

+40% Max Grenades

+7.5% Refill Chance

+60% Max Grenades

+10% Refill Chance

+80% Max Grenades

Notes
  • Any launcher kill will be able to proc this. (M79, RPG, etc) The corners of your screen will flash a green color when this perk activates
  • All items that can be thrown are considered "grenades", including but not limited to Molotovs, Heal Grenades, Shurikens, Zombie Bait, and C4.
  • Does not increase how many explosives that launchers can hold.
  • This perk can be strengthed further with the "Lightning charge" perk, as the 12% refill each kill is based around the grenades' end-of-night recharge.
  • The refill chance is influenced by the Lucky Charm perk.
Tips
  • Mainly used if you are spawnkilling with a launcher and have molotov and gas grenade on the side to make a bit of extra money during midgame.
  • This can be useful because Zombie Bait and Pipe Bombs count as "Grenades" meaning you can have infinite baits.
Survivalpack
Survival Pack
Start the game with extra equipment which weighs 0. Your equipment also recharges faster. +1 Equipment

+7.5% Charge Speed

+2 Equipment

+15% Charge Speed

+3 Equipment

+22.5% Charge Speed

+4 Equipment

+30% Charge Speed

Notes
  • At level 1 this gives the Grenade.
  • At level 2 this will also give the First Aid Kit.
  • At level 3 this will also give Caltrops.
  • At level 4 this will also give the Deployable Ammo.
  • The charge speed is additive with lightning charge.
  • The equipment gained from this perk start with a sell price of 0 and have no upgrades, and weigh 0. You can still upgrade them.
  • In Career, purchase the items before you equip the perk. If this is not done, the items will not be saved when you rejoin Career.
Tips
  • It is recommended to avoid this perk, as it is essentially a very weak combination of Piggy Bank, Weightlifter, and Lightning Charge.
  • The gear provided is bad for early game compared to other strategies, so if you want the charge speed you can just use other strategies and then later put on lightning charge instead of this perk if you are going for a gear build.
  • The gear has almost no impact endgame so even if it weighs 0 they might as well not exist.
Adrenaline
Adrenaline
Killing an enemy grants unlimited stamina for a few seconds. +2.1s Duration +2.8s Duration +3.5s Duration +4.2s Duration
Notes
  • Any of your kills will count for this perk.
  • Subsequent kills will refresh the duration.
  • You cannot sprint if your stamina is at 0.
  • Does not apply to Riot Shield.
Tips
  • Useful perk for Trailblazer and Run N' Gun builds.
  • Can be effective with Critical Speed and Bullet Hell if Run N' Gun is prestiged.
  • Can potentially be used endgame if your team is able to kill the zombies that counter bait builds.
  • Useful for brawn over brains.
Betterthannew
Better Than New
Your healing effects provide a 35% increase to resistance, reload speed and melee attack speed. +6s Duration +12s Duration +18s Duration +24s Duration
Notes
  • Does not work with lifesteal effects, such as Life Leech, Vampirism, Life Burn, and Critical Heal.
  • Healing effects include being healed/healing your allies via perks & consumables.
Tips
  • Works with Overwatch, allowing you to buff your allies from afar.
  • Mainly only used by support players or melee with scavenger.
  • Works with Carpenter.
Fastforward
Fast Forward
Reduces the cooldown from other perks. -15% Cooldown -20% Cooldown -25% Cooldown -30% Cooldown
Notes
  • Works with perks with a cooldown, such as Assassin, Critical Shock, Supernova, Equilibrium, Untouchable, Afterimage, and Static Discharge.
  • Does not accelerate Charged Shot or Frost Armour.
Tips
  • This perk is good for certain tank builds, or using Shadow Strike build with Critical Shock and/or Assassin.
Stunning Strikes
Stunning Strikes
Melee hits have a chance to stun enemies for 1.2s. Chance is reduced by 50% for Chainsaws and increased by 100% for your Knife. +10% Stun Chance +20% Stun Chance +30% Stun Chance +40% Stun Chance
Notes
  • Chainsaw/Knife percentage modifiers are multiplicative.
  • Zombies cannot be stunned more than once by the same type of stun.
Tips
  • Can be paired with USP, MP5, or R870 with their Critical Conussion upgrade that guarantees critical hits on stunned zombies.

Yellow Perks (Monetary)

Yellow perks increase the player's money gain, affect buy/sell values, and increase stats based on other yellow perks. Almost all of these are locking perks. Yellow perks are very situational, and perk builds exclusively using yellow perks are often unadvised. You should refrain from using yellow perks unless it's on your 12th slot, or if you are using a money alt.

Generally, if you are using yellow perks, you will have noticeably less power in the endgame. You may need to compensate by spending extra money on shop upgrades and equipment.

Perk Description Level 1 Level 2 Level 3 Level 4
Profiteer
Profiteer
Increases the amount of money you gain. +7% Money Earned +14% Money Earned +21% Money Earned +28% Money Earned
Notes
  • Increases money from both Hit and Kill shots.
  • Affects money gained from beating a wave as well.
Tips
  • If you cannot spawn kill zombies, then you probably should not use this perk in the first place, as you would get almost the same exact money by using Glass Cannon due to the extra kills, or Bullet Storm and/or Deep Impact for the extra hit money and kills.
  • The best use for this is to get money faster on Career Mode, since it is easier to spawnkill on that mode, allowing this perk to have a larger impact.
Bargainer
Bargainer
Reduces the cost of buying weapons and increases their sell value. +6.25% Sell Value

-20% Buy Cost

+12.5% Sell Value

-25% Buy Cost

+18.75% Sell Value

-30% Buy Cost

+25% Sell Value

-35% Buy Cost

Notes
  • Default return rate is 80%
  • At lvl 1-4, the rate is 85%, 90%, 95%, and 100%
  • Banned in Career Mode.
Tips
  • The main use for this is to pop it on if you are going to leave a server, allowing you to get more money back for all your guns and equipment. You would then donate to someone, and leave.
  • As for using this perk during gameplay, you will have an easy time progressing through weapons in the early game and midgame.
  • If you have this prestiged, pair this with Investor+Mutual Fund, and you basically have free interest.
Piggy Bank
Piggy Bank
Start the game with extra money. +2500 Money +5000 Money +7500 Money +10000 Money
Notes
  • On Nightmare and Impossible difficulty, the amount of money from Piggy Bank will be the amount of debt, and there is a cap of 6 piggy banks that can be used on those difficulties as well.
  • Exceeding the Piggy Bank limit will disable the function of subsequent Piggy Banks. Players with debt can not reduce their money below the debt when donating and can not donate at all when below it.
  • Banned in Career Mode.
Tips
  • Just like the Escape Artist, this perk is popular amongst newer players, but the poor performance of the Flintlock Rifle ends up making Piggy Bank not as impactful for the success of a run. On Nightmare and lower, this perk is unnecessary as you can do just fine without it. However, on Impossible, this is often used to obtain the Baseball Bat on Night 1 for the Blood God strategy, however it is not completely necessary. Using this perk when not necessary hurts your endgame as you're not using a perk that's useful for that part of the game.
  • The Debt system can be circumvented by planning out how you're going to spend your money, and then donating the rest before you spend it.
Contractor
Contractor
Reduces the cost of shop upgrades and repairs. 50% Stack. -15% Shop Costs -20% Shop Costs -25% Shop Costs -30% Shop Costs
Notes
  • The benefits of this perk apply to all players.
  • Takes 1 night before the bonus is applied.
  • This does not affect the cost of Secret/Mobile Shop weapons.
  • This can affect the buy cost of player upgrades like NV Goggles and Body Armor, but can't affect upgrade costs.
Tips
  • Usually seen on money alts.
  • Often used in comps that rely on shop upgrades or find themselves using up significant amounts of ammo.
Shadow Hunter
Shadow Hunter
Increases the amount of money gained from special enemies. +50% Special Money +100% Special Money +150% Special Money +200% Special Money
Notes
  • Wraiths, Frost Wraiths, Drench Wraiths, Destroyers, Lurkers, Berserkers, Swamp Giants, Miners, Annihilators, Spongers, Hunters, and the Boss are considered special enemies.
  • However, it will not work on Swamp Giant.
  • Additive with other cash perks.
Tips
  • Generally an extremely weak perk, since these zombies have reduced spawn chances and are typically tougher than most other zombies.
  • This perk is best on the Underground map due to the large quantity of miners.
  • It is also useful on Arctic due to the Frost Wraiths funneling out of a single tunnel.
  • It is most effective on the Encroaching Fog and Chainsaw Massacre Mutation, as those gamemodes have heavily increased Specials.
Investor
Investor
At the end of each night your money will gain interest. Additionally disables the ability to receive donations. +3% Return +6% Return +9% Return +12% Return
Notes
  • Interest is given one second after being given the wave money bonus. (Shown in red color on the bottom left of your screen, where the money is found in your HUD)
  • Banned in Career Mode.
Tips
  • Because of the drawback of not being able to receive donations, this perk is not recommended in most cases,
  • It requires you to hold onto a lot of money for it to be effective. With 100k cash, you can make 12k a wave. However, you could spend that 100k on weapons and gear and use it to make 30k a wave, so it's all about figuring out if the interest can make more money than what you could produce normally.
    • Prestiging Bargainer basically gets rid of this, as long as you are quick to sell your weapons.
      • Reset at 5:30 in order to sell your weapons before the wave bonus is given.
  • Used on money alts.
Bank Breaker
Bank Breaker
Increases the amount of money you gain from critical hits. +16% Critical Money +32% Critical Money +48% Critical Money +64% Critical Money
Notes
  • Counts both Hit and Kill money.
  • Additive with other money perks.
Tips
  • Conditional perk that only activates with critical hits. Therefore, a crit-oriented loadout is strongly recommended.
  • Useful for an early money boost when using the Blood God strat.
Arms Deal
Arms Deal
Reduces the cost of weapons that cost the same or less than your most expensive one. Arms Deal weapons deal 75% reduced damage unless you have a more expensive one. -90% Buy Cost

-50% Upgrade Cost

-92.5% Buy Cost

-55% Upgrade Cost

-95% Buy Cost

-60% Upgrade Cost

-97.5% Buy Cost

-65% Upgrade Cost

Notes
  • Reduces both upgrade and purchase cost of weapons cheaper than your most expensive one.
  • The “Arms Deal: Yes” stat will appear on weapons bought with Arms Deal.
  • Buying two weapons with the exact same price will cause both weapons to have cheaper upgrade costs, despite one of the weapons not being an Arms Deal weapon.
  • This no longer works with gear.
  • Banned in Career Mode.
Tips
  • There isn't really a reason to buy a weapon that is cheaper than your current, unless you want a backup weapon to avoid getting ambushed while reloading, or “dual wield” two slow-firing shotguns.
Money Marker
Money Marker
Increases the amount of non-lethal money you gain. +15% Hit Money +30% Hit Money +45% Hit Money +60% Hit Money
Notes
  • Only counts Hit Money.
Tips
  • Low damage, fast-firing weapons receive the most benefit from this (i.e. Laser SMG, AA-12, Micro Uzi, AUG, and starter pistol).
  • Often best paired with perks such as Bullet Storm and Deep Impact.
  • More useful in higher difficulties due to zombies having increased hp.
  • If you are selecting a perk for the 12th slot, use this if you are money printing with low damage and fast-firing weapons.
Money is Power
Money is Power
Increases your damage, reload speed, and firearm attack speed for every yellow perk equipped up to 4. +1% Damage
+2% Reload Speed
+2% Attack Speed
+2% Damage
+4% Reload Speed
+4% Attack Speed
+3% Damage
+6% Reload Speed
+6% Attack Speed
+4% Damage
+8% Reload Speed
+8% Attack Speed
Notes
  • The perk itself counts towards the amount of yellow perks equipped.
  • Using it by itself is 25% less output than just using a standard red perk.
  • It gains 0.75 value for every yellow perk when compared to a red perk (standard red perks are considered 1 value) and can get up to 3 value with 4 yellows.
  • With 1/2/3 other yellow perks, you get 1.5/2.25/3 value of damage output at the cost of 2/3/4 perk slots, with a total earlygame value of 2.5/4.25/6.
Tips
  • If you used Piggy Bank and/or Bank Breaker for blood god, then this may be a nice perk to use to retain some endgame power.
  • If money is of no concern, this can be used in your 12th Perk Slot to have slightly extra DPS.
Tacticool
Tacticool
Reduces the cost of weapon upgrades. -20% Weapon Upgrade Costs -25% Weapon Upgrade Costs -30% Weapon Upgrade Costs -35% Weapon Upgrade Costs
Notes
  • Affects equipment.
  • Banned in Career Mode.
Tips
  • Can be used to make maxing out a weapon easier to obtain.
Boss Bounty
Boss Bounty
Increases the money gained from Boss kills. +5000 Boss Money +10000 Boss Money +15000 Boss Money +20000 Boss Money
Notes
  • Does not increase with every subsequent boss kill.
  • Does not stack with any other yellow perk.
Tips
  • Would not recommend it even for the Pacifist challenge.
  • Works well in the Boss Rush Mutation.
  • Used on money alts.
Survival Contract
Survival Contract
Increases the amount of money you gain at the end of each night. +700 Round Money +1400 Round Money +2100 Round Money +2800 Round Money
Notes
  • Does not scale with amount of waves survived.
  • More consistent than Boss Bounty, but provides a less overall reward.
  • Works with Profiteer and Jack of Trades.
Tips
  • Can be useful for the Pacifist Challenge, but not required.
  • Used on money alts.
  • If you are selecting a perk for the 12th slot, use this for an early game money boost.
Mutualfund
Mutual Fund
At the end of each night, you and your team's money will gain interest. Stacks at 50% efficiency. +1.5% Interest +3% Interest +4.5% Interest +6% Interest
Notes
  • Interest is given shortly after being given the wave money bonus. (Show in red color on the bottom left of you screen. Where your money is found in the HUD)
  • Banned in Career Mode.
  • Unlike Investor, you can still receive donations.
  • Using more than 1 causes the rest to give half as much.
Tips
  • Basically Investor, but for everyone, at the cost of halved interest rate. You also retain the ability to receive donation.
  • Recommended to use this over Investor if you're playing within a team.
  • Useful in most scenarios where money strategies aren't planned out.
Gymmembership
Gym Membership
Start the game with extra Body Building upgrades purchased. +40% Free Body Building +60% Free Body Building +80% Free Body Building +100% Free Body Building
Notes

Listed below is how much the pre-purchased upgrades improve your stats

  • Max Health: 75 > 125 > 150 > 200
  • Health Regen: 0.5 > 1 > 1.25 > 1.5
  • Max Stamina: 50 > 100 > 125 > 200
  • Stamina Regen: 0.75 > 1 > 1.5 > 1.75
  • Max Weight: 2 > 3 > 4 > 5
  • Handling: 10% > 15% > 20% > 25%
Tips
  • Effectively a straight upgrade to Healthy Health and Speedload, as well as a bit of Marathon Man, Recovery Man, and Heavy Lifter during the earlygame and midgame.
  • Usable in the Brawn over Brains challenge.
  • After the 6.1.5 update, upgrades in the Body Building section became very expensive to max out, and many of the upgrades gained more stages. As a result, this perk became more useful compared to the time when it was first introduced, as a player can save a lot of money for Body Building upgrades.
Midastouch
Midas Touch
Zombies that melee you or zombies you melee become golden, providing extra money. Does not apply to special zombies. +15% Golden Money +30% Golden Money +45% Golden Money +60% Golden Money
Notes
  • The perk still triggers when one-shotting zombies with melee even though the model doesn't turn into gold.
  • Other players can also gain extra money when they kill a golden zombie.
Tips
  • Can generate a lot of early-game money when starting with a melee build.
  • Can be used by tanks to help give extra money to teammates.
  • Use Bank Breaker instead of this perk if someone is doing Blood God.
Philanthropy
Philanthropy
Increases the amount of money teammates receive from your donations. The bonus cannot be re-donated. The ability to receive donations is disabled. +10% Donation money +20% Donation money +30% Donation money +40% Donation money
Notes
  • Good for money alt accounts.
Tips
  • Since the bonus cannot be re-donated, it is wise to plan out how you will spend your funds.
  • Because of the drawback of not being able to receive donations, it is better to have extra source of income (like the Shop's Invested Income upgrade).
Private Medical
Private Medical
Gain money for healing teammates based on how much health was restored. Reduced by 50% for AoE and excess healing. 150% Heal Money 300% Heal Money 450% Heal Money 600% Heal Money
Notes
  • 100% Heal Money means every 1HP restored = $1
  • Healing sources from Bandages, First Aid Kits, and Heal Grenades grant money.
  • Healing Over Time sources such as Bandages and First Aid Kits grant money.
  • Temporary Health sources such as Booster Kits or the Overheal Perk do not grant money.
  • Field Medic perk can boost healing, thus also boost the money gained.
  • Dying Wish also grants money.
  • Supply Crate healing upgrade grants money.
  • Overwatch perk healing grants money.
  • Teleport Pad healing upgrade grants money.
  • Campfire does not grant money, as it does not directly heal, but gives a health regen buff.
Tips

Purple Perks (Hybrid)

Purple perks have different bonuses that can fit into multiple perk categories. This perk color was introduced in Patch 5.0.

Perk Description Level 1 Level 2 Level 3 Level 4
Jack of Trades
Jack of Trades
Increases bullet damage, resistance, movement speed and income. +2% Damage
+7.5% Resistance
+1.5% Speed
+3.5% Money
+4% Damage
+15% Resistance
+3% Speed
+7% Money
+6% Damage
+22.5% Resistance
+4.5% Speed
+10.5% Money
+8% Damage
+30% Resistance
+6% Speed
+14% Money
Notes
  • All benefits are additive.
Tips
  • It is unlikely that this perk will have much impact on gameplay at all, as typically only 1 or 2 of the stats will have a proper impact on your performance.
  • These bonuses are generally underwhelming in most circumstances, where it is usually more efficient to specialize in one type of build.
  • It is sometimes seen with builds that rely on getting as much speed as possible.
Lone Wolf
Lone Wolf
Increases your damage, health regen, and stamina regen when more than 48 studs away from your team. Effects are increased by 40% for every other player in the game. +3% Damage
+0.5% Health Regen
+0.5% Stamina Regen
+6% Damage
+1.0% Health Regen
+1.0% Stamina Regen
+9% Damage
+1.5% Health Regen
+1.5% Stamina Regen
+12% Damage
+2.0% Health Regen
+1.5% Stamina Regen
Notes
  • There must be no teammates within 48 stud radius of you for this perk to be active.
  • Increases in power by 40% per additional player in the game.
  • 6 players in game will provide 9% damage per stage while active.
Tips
  • 48 studs may sound like alot, but that range is only about 12 connected Robloxians wide, which should be easy to avoid.
  • Can be seen on melee builds
  • If everyone is at the barricade, or if everyone is frontlining with you, you will have a very hard time using this perk effectively as a frontliner.
    • You'll have a hard time as a rooftop sniper if other players are on the rooftop aswell.
Wolf Pack
Wolf Pack
Increases your reload speed, weapon control and resistance when closer than 32 studs from your team. +7% Reload Speed
+15% Control
+10% Resistance
+14% Reload Speed
+30% Control
+20% Resistance
+21% Reload Speed
+45% Control
+30% Resistance
+28% Reload Speed
+60% Control
+40% Resistance
Notes
  • A teammate must be present within a 32 stud radius for this to activate.
Tips
  • There is a visual buff to indicate Wolf Pack is active, you may need to focus on staying near a teammate.
  • Often used as an alternative to Steady Aim, if there is always going to be a teammate near you.
Bunkered Down
Bunkered Down
Increases your damage and resistance while near the barricade. +7% Damage
+15% Resistance
+14% Damage
+30% Resistance
+21% Damage
+45% Resistance
+28% Damage
+60% Resistance
Notes
  • You will lose these benefits if the barricade is torn down.
  • You have to be quite close to the barricade, being near the ammo box/on the shop roof will not allow you to keep the buffs.
Tips
  • On higher difficulties, it is difficult to keep the zombies pushed back enough to keep the barricade from breaking.
    • This perk could be the difference between the barricade holding up or getting destroyed, but if it gets destroyed anyway, the lack of a different perk will make things even harder.
Danger Zone
Danger Zone
Gain increased critical chance, reload speed and armour regen while far away from the Shop. +3% Critical Chance
+9% Reload Speed
+1% Armour Regen
+6% Critical Chance
+18% Reload Speed
+2% Armour Regen
+9% Critical Chance
+27% Reload Speed
+3% Armour Regen
+12% Critical Chance
+36% Reload Speed
+4% Armour Regen
Notes
  • You need to be ~250 studs from the shop for this to activate.
Tips
  • Can sometimes be used during early and midgame.
  • Not typically used in the endgame, as it is usually not safe to be in the Danger Zone in the endgame.
  • Recommended to avoid this perk, unless you are doing The Danger Zone challenge or have applicable strategy that uses up a lot of perk slots.
Scavenger
Scavenger
Killing an enemy has a chance for them to drop a supply package, providing a 40% speed boost as well as ammo, health, armour or money. +6% Scavenger Chance +12% Scavenger Chance +18% Scavenger Chance +24% Scavenger Chance
Notes
  • Walk over a scavenger package to pick it up.
  • Packages could provide 10% of max total ammo or 100% mag up to 30 (whichever is larger), 100 armour, 100 health, or 400 money
  • The chances of any of the bonuses are evenly split.
  • By default, only the person who killed the zombie can pick up the package it dropped. This can be changed to all players in the settings.
Tips
  • 33.6% chance with lvl 4 Lucky Charm.
  • The average gain per kill from this perk at lvl 4 is 24 cash, 6 hp, 6 armour, and 0.6% ammo or 1.5 ammo.
  • Used with Grenadier, Run N Gun and Melee builds.
Mist Walker
Mist Walker
Gain increased movement speed and regenerate a percentage of your max health each second during stealth. +5% Speed
+1.5% Health Regen
+10% Speed

+3.0% Health Regen

+15% Speed

+4.5% Health Regen

+20% Speed

+6.0% Health Regen

Notes
  • Requires being in stealth.
  • Scales with your max hp, healing up to 6% of your hp per second at Level 4.
Tips
  • A difficult perk to use, as it requires the player to go stealth, and does not show much use unless the player is in stealth for a while.
  • Pairs well with strategies utilizing Life Link.
  • Can allow you to survive Level 3 and Level 4 Headless Zombie fire DoT.
Assassin
Assassin
Not dealing damage or getting targeted for 8s grants increased damage for 4s. Remaining untargeted upon killing grants stealth and a 25% speed boost. 30s Cooldown. 2x Damage
+4s Stealth and Speed Duration
2.5x Damage

+8s Stealth and Speed Duration

3x Damage

+12s Stealth and Speed Duration

3.5x Damage

+16s Stealth and Speed Duration

Notes
  • The only potential use is with Shadow Strike.
  • The 3 seconds of increased damage begins after hitting a target after not firing for more than 5 seconds.
  • There is a small grace period after entering stealth before you can exit stealth, however it is so small that you are still likely to exit stealth the moment you enter it if you are using a weapon that does not fire slowly.
Tips
  • Can be used with Shadow Strike to get up to 16 seconds of 100% crit chance every roughly 30 seconds, but it’s usually just better to replace the 2 perk slots with normal red perks or to use Ghost instead.
    • The requirement of getting a kill without accidentally breaking stealth with the small grace period makes this combo difficult to use, especially with automatic weapons.
Rampage
Rampage
Melee kills increase your resistance, health regen, and movement speed. Stacks up to 5 times. Lose 1 stack after not killing for 2s. 2% resistance

0.2 health regen

1% speed

4% resistance

0.4 health regen

2% speed

6% resistance

0.6 health regen

3% speed

8% resistance

0.8 health regen

4% speed

Notes
  • The level 4 version has 40% resistance, 3 hp/s, and 12% speed at max stacks, making this generally better than Juggernaut for melee builds.
Tips
  • You may want to use Reach with this perk, as the extra speed with high enough ping may make it so that the zombies stay constantly out of your range while still being able to hit you.
  • If you are already able to melee fine using Juggernaut instead of this, then consider spending perk points and prestiges elsewhere, as Juggernaut also works for tank builds.
Underdog
Underdog
Increases your damage and resistance for every enemy that targets you within 80 studs. Max 8 targets. 1% Damage

1.25% Resistance

2% Damage

2.5% Resistance

3% Damage

3.75% Resistance

4% Damage

5% Resistance

Notes
  • At level 4 with max stacks, you gain 32% damage and 40% resistance. Level 3 24% damage and 30% resistance. Level 2 16% damage and 20% resistance. Level 1 8% damage and 10% resistance.
  • This works with melee, making this sometimes a better version of Bloodthirst as it comes with a bit of resistance and slightly more damage.
Tips
  • If you are solo on wave 1 (having a low max zombie alive count) or competing with other frontliners, then this may potentially be worse than an equivalent damage perk.
  • Must have for Shotgunners with AA-12, Laser Shotgun, or USAS-12 who are constantly being targeted by zombies.
  • Can also be useful for Melee builds
Overcharged
Overcharged
While you have temporary health, gain increased action speed. +15% Action Speed +30% Action Speed +45% Action Speed +60% Action Speed
Notes
  • Action Speed includes Refilling, Reloading, Melee Attack Speed, and Grenade Throw Time.
  • Temporary Health is the yellow bar that appears on your health whenever taking a booster kit consumable, or with the Overheal perk.
Tips
  • Powerful with melee weapons.
  • Typically used with Overheal to get temporary health.
Quickdraw
Quickdraw
Increases your action speed. Weapon aim and grenade throw times are reduced by 50%. +7% Action Speed +14% Action Speed +21% Action Speed +28% Action Speed
Notes
  • Action Speed includes Refilling, Reloading, Melee Attack Speed, and Grenade Throw Time.
Tips

Trivia

Screenshot 2022-10-19 1.16

Old Interface

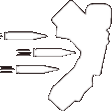
  • Originally, the perk interface looked like this:
    • The current interface still inherits some features from the old one.
    • It was its own menu before it got merged with Unlocks.
    • It showed the names of perks rather than images.
  • Some perks have had their bonuses changed at some point.
    • Grenadier originally required grenade kills for grenades to be refilled, giving people a ridiculous amount of XP and in-game money with other perks. This was later changed to launchers only in patch 5.7.0.
      RobloxScreenShot20221226 175444379 (2)

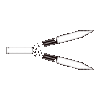
      Current interface as of Version 6.0.2

    • Beserker had 15%/30%/45%/60% max damage instead of 20%/40%/60%/80%.
    • Life Infusion had a 60% chance to increase your max health at one point, and any max health gained was set back to 0 at the start and end of each night.
    • Piggy Bank has had its money gain changed between 2000 and 2500 many times.
    • Shockproof gave indirect resistance instead of a flat out damage reduction, and did not decrease stun duration.
      • It was 125%/250%/375%/500% before it got changed. This would have reduced indirect damage by 80% at level 4.
    • Stopping Power originally had 5%/10%/15%/20% damage. This was later changed in Patch 6.0 to 4%/8%/12%/16%.
  • Some purple perks, such as Jack of Trades, Lone Wolf, and Wolf Pack, used to be green perks.
  • Backup Weapon, Survival Pack, and Gym Membership are the only three perks that provide free items/upgrades at the start of the game.
    • Backup Weapon used to be the only locking red perk, until Reckless Supply was added to the game as of 6.2 update.
  • Money is Power stands out from the rest of the yellow perks for the following characteristics:
    • It is the only non-locking yellow perk.
    • It is the only yellow perk that doesn't affect player's money in any way (neither increasing your money nor offering discount).
    • It is the only yellow perk to provide buffs to the player's stat, not counting Gym Membership's free Body Building upgrades.
  • Some perks disable a player's certain abilities:
    • Confident Handling disables your ability to aim down sight.
    • Reckless Supply disables your ability to refill ammo from the Ammo Box at night.
    • Shadow Gear disables your ability to pick up deployed equipment.
    • Investor and Philanthropy disables your ability to receive donation.
  • Time Freeze and Freeze Frame are the only two perks with an ability to stop the time.
  • Midnight Hunter is the only perk to be directly affected by the in-game time.
  • Trailblazer, Supernova, and Thorns are only three perks that can directly damage zombies.
  • Time Freeze and Escape Artist used to recharge every 5 nights and also used to be locking.
  • Weightlifter and Weapon Hoarder used to be locking.
Advertisement